Skip to content

Paisley, Chintz, and Calico: are they all the same?

Paisley, Chintz, and Calico: are they all the same? published on No Comments on Paisley, Chintz, and Calico: are they all the same?

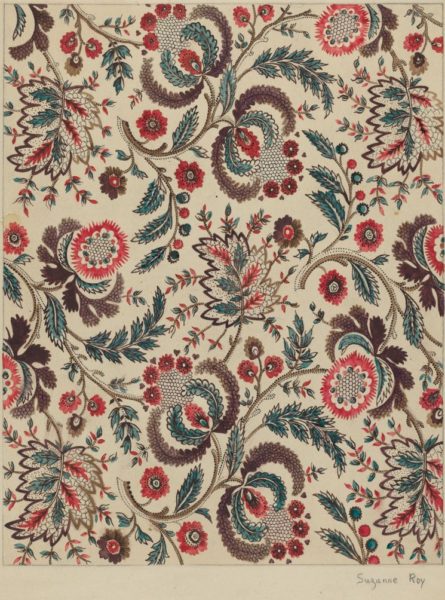
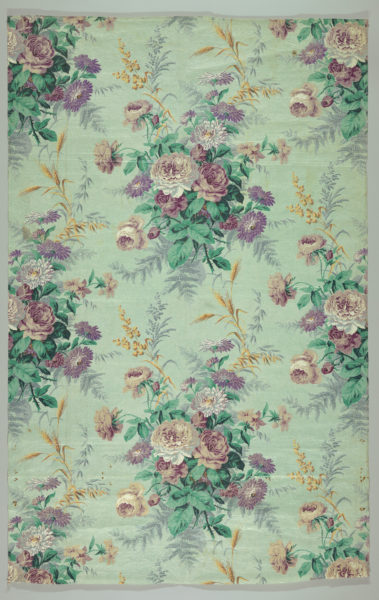
I have been having some big dreams about decor DIYs that will just make everything in my house a little extra better. A lot of the ideas are actually for small projects, many small projects that all require fabric or pattern. So, I found myself perusing Spoonflower for fabric and wallpapers. In the search for my favorite variety of floral, something I have always thought of as Jacobean (above), I realized that all of my vocabulary is wrong. Or at least the modern application of the vocabulary by designers uploading patterns to Spoonflower is completely different than mine. I am not a textile historian, so I could never argue that my descriptive word choice is the right one, which is what led me down this particular rabbit hole.

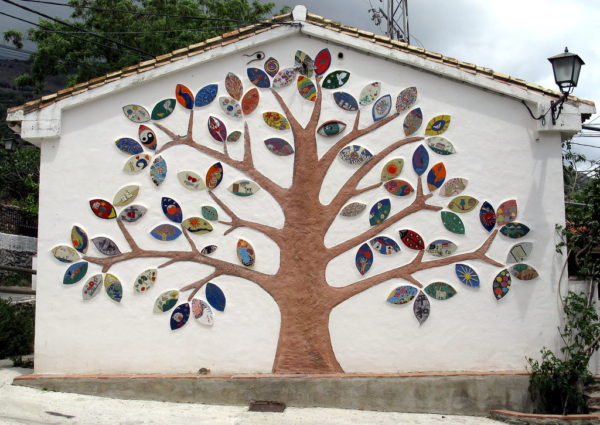
Turns out I didn’t really have the wrong word. Patterns popular in Jacobean design were influenced by both Flemish tapestries and Indian palampores. The designs were flowing and floral, with acanthus leaves arranged all over, delicate flowering trees inspired by palampores, and birds, animals, and the tree of life taken from crewel embroidery.

Yet Jacobean is not what people reliably label the floral, acanthus leaf, or all over tree of life patterns.

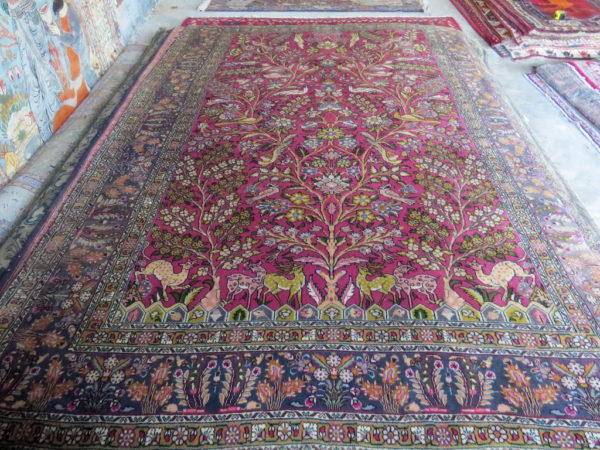
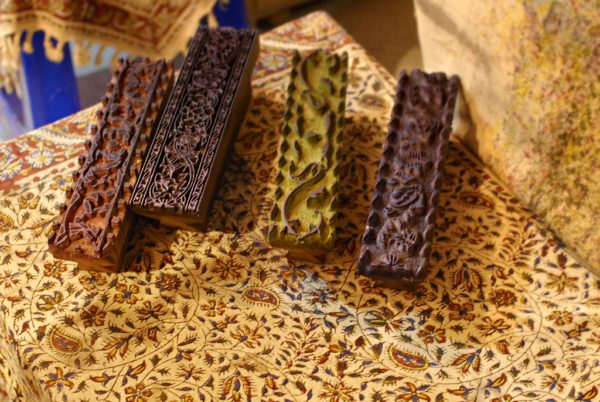
Of course, tree of life designs now come in many different varieties, and rarely show up as the all over pattern from the ‘Tabriz Tree of Life Deer Person Rug’ example above. So then I noticed, while searching, that many of the designs I was looking for were labeled as chintz.

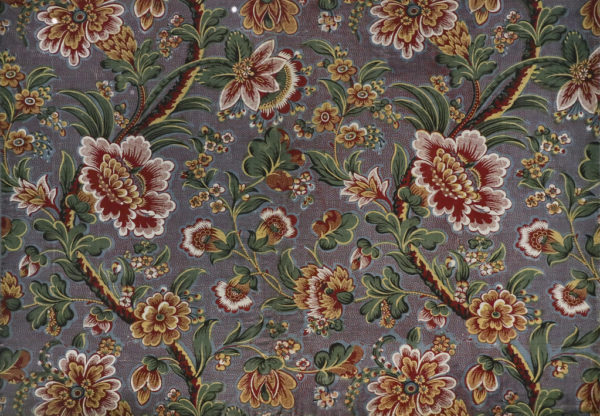
My initial ideas of chintz was a big, ‘blousy,’ floral with large cabbage roses in a kind of pastel on pastel print that I remembered from grandma couches in the early 80s. It turns out that chintz is the name for any printed cotton fabric with a glazed finish and bright multicolored patterns. The patterns were eventually applied to many other textiles, like wall paper and ceramic, so now chintz is simply an all over floral. This would include my Jacobean floral ideal, but it also gave me a lot more to wade through. Then I wondered…what is calico? I thought calico was an all over floral print…

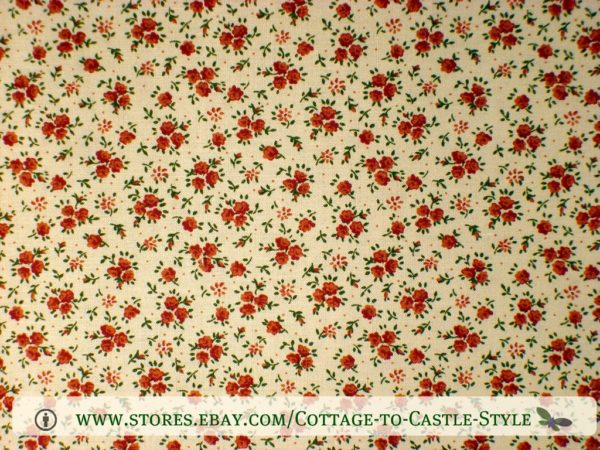
And, it is, at least in the U.S. where the printed cotton became known as calico instead of just the plain woven unbleached cotton that is called calico in the UK. Calico, like the palampores that inspired Jacobean patterns and the chintz that took Europe by storm in the 1600s, originated in India. The calico pattern is also ensconced within the overarching concept of chintz.

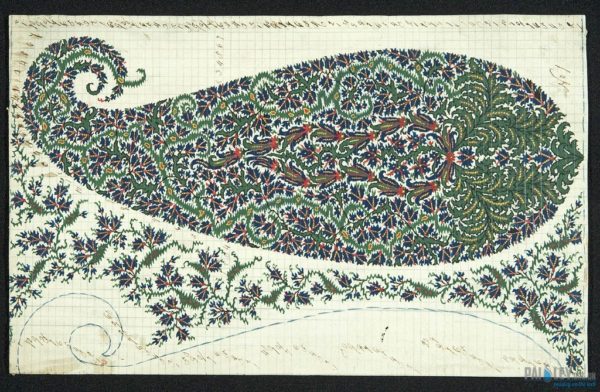
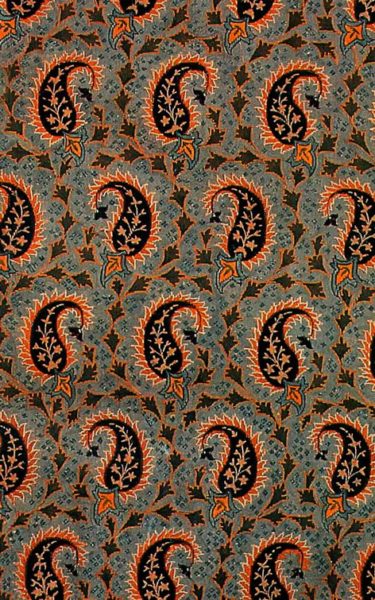
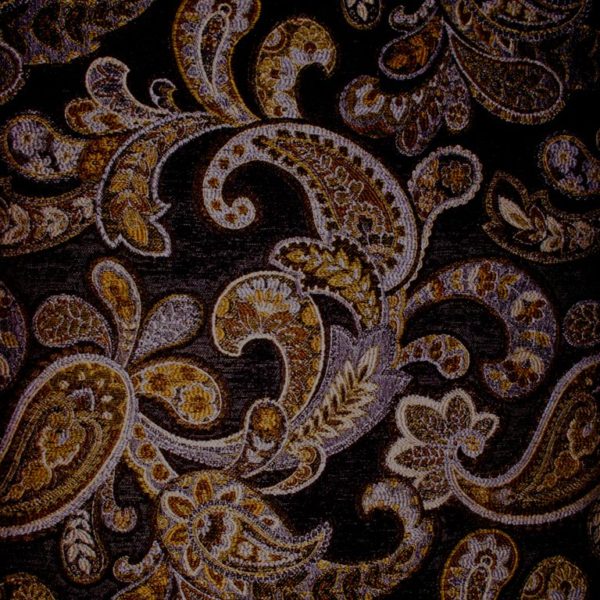
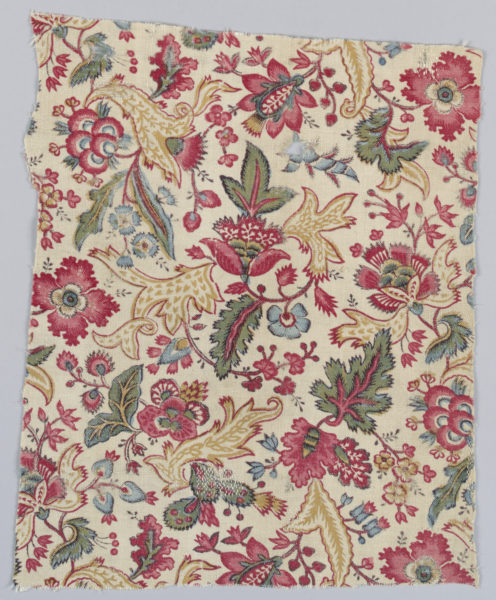
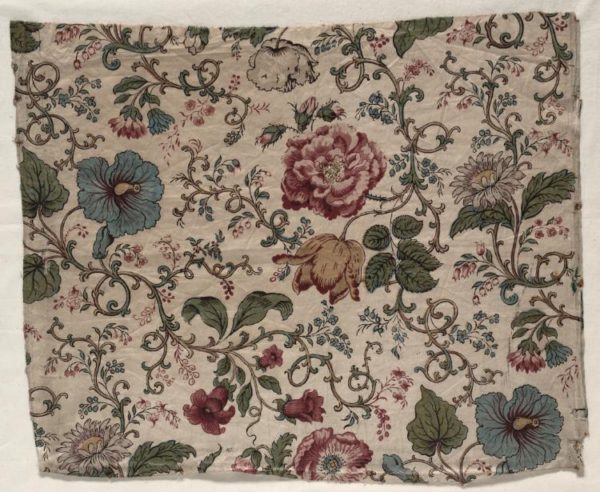
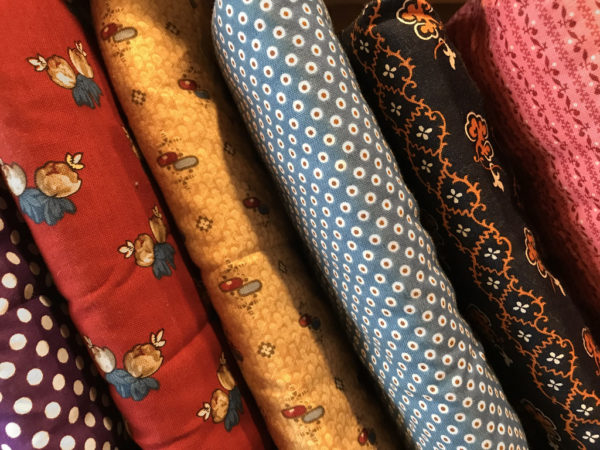
But paisley is not chintz, mostly. Sometimes when the paisley teardrop is included in a rambling floral design like the ‘Paisley” on the right, it is chintz? But mostly, paisley is the one floral print exception that is viewed separately from chintz. Paisley is of Persian origin, and the teardrop shaped designs were also imported from India into the UK where the pattern was given the name paisley after the town of Paisley where it was produced.

And, here is where I want to wriggle back out of the rabbit hole. I found that yes, Jacobean floral, calico, and sometimes paisley are all chintz, but chintz is not necessarily always either Jacobean floral, calico or paisley. Whether this statement is wholly accurate doesn’t really matter either, because platforms that allow tag and metadata creation by up-loaders are always going to suffer from the popular understanding of a term, if there is any real understanding.

References

Zodiac clock

Zodiac clock published on No Comments on Zodiac clock

While visiting some of our excellent thrift stores I noticed a couple of mid century clocks with the zodiac arranged on the face. I was intrigued, I would have never suspected mainstream interest in the zodiac during the 40s and 50s. Unfortunately, I didn’t have my camera with me when we were shopping, but I did follow up with a search on eBay and found some more examples:

Of course, the more I thought about it, the more I wanted one of my own for my mid century house. It just so happened I had a clock face wood blank and a clock kit that I had inherited from my mother’s craft supplies.

As to the design, I noticed that there didn’t seem to be too much consistency in how the zodiac is arranged in reference to the hours display. Each of the examples I found starts in a different place. I decided to start mine where the zodiac signs would roughly line up if every hour were representative of the month of the year. I didn’t include a separate sectioning out of the clock face for the numbering so the dividing lines between zodiac signs serve as my hour marks. This effectively shifts the signs forward a bit, but the signs themselves do not start when the month starts so I was happy.

Overall, I am pretty happy with it. It was a soft, cheap wood that either flaked away in large chips with hand tools, or feathered up with a rotary carver. This forced me to change my design dreams a little and accept a less finely detailed result. I used paint to highlight the simple relief and cover carving mistakes. If I had been seeking out new supplies for this project, I would’ve made sure to obtain a harder wood that would’ve been more conducive to carving. Part of my pleasure in finishing this up, however, is most definitely tied to using material I already had in the house.

Candle Salvage

Candle Salvage published on No Comments on Candle Salvage

Hello again, friends. I’m here with the latest installment of LeEtta’s gonna try something new, and also, making stuff with garbage. Now…picture it: central Florida 2015. A couple has moved into a 1949 block house with original bathrooms and tile floors, and spent their first winter in a house they would later call an icebox. To prepare for the next winter they get a couple more area rugs before turning their attention to the enormous fireplace in their living room.

But, even if the house is chilly during the season that Florida calls winter, it isn’t chilly enough, or chilly for long enough, for a full blown wood crackling fire. So, they outfit their fire place with pillar candles and light them up on the colder nights. Eventually they burn through 6 to or more a season.

And this is where I got really sick of tossing candle bottoms. I am sad to say I tossed a few before I cried fowl and started collecting them with the intent to reuse them somehow. Searching online I found no shortage of people doing the same. Around the same time I inherited a good deal of my grandmother’s craft stash which included a bag full of wicks. The planets had aligned.

Full confession, this year is not the first year I have tried this; it is the second. But it is the first year I felt like I had some tricks up my sleeve to share with you.

My first trick was, of course, saving more trash in order to help with this process. I only bought one pillar candle mold from the store. I didn’t really want more, and I especially didn’t want to find a place to keep any more. So, I saved up some half ‘n half, heavy cream, and salt containers of both plastic and cardboard variety.

Continue reading Candle Salvage

Upcycle crafting

Upcycle crafting published on No Comments on Upcycle crafting

You may have noticed the uptick in crafty blogging lately. I did a whole bunch of making prior to the holidays. Some of the the makes were for gifts and some were for decoration. I really enjoyed myself and I feel like I am returning to a more makery me. Crafty posts may continue.

I was gifted a glass bottle cutting kit at the end of 2020 and the two first crafts I wanted to tackle were bottle bottom candles and bottle chimes. I had bought a bottle chime for our house a while ago. It has a chain running through it from the hanging ring through the clapper and down to the wind catch. I also scoped out some tutorials online that used hot clue and rope, but in the end, used the bottle chime I had as a pattern.

I knew rope and glue wouldn’t make it through a Florida summer. Florida summers have even eaten through the small gauge chain in a lot of my store bought windchimes, contributing to a pile of chimes that I have to repair. Given that the glass would shatter if the rope/chain breaks, I thought it would be better to be hefty than dainty.

I used large wooden beads as the stopper inside that holds the bottle at the right height and the clapper. The beads are attached to the chain pieces with heavy gauge craft wire. For the hanging loop, I used some keyrings that I had on hand. I am pretty happy with the results.

Are these spa gift crafts?

Are these spa gift crafts? published on No Comments on Are these spa gift crafts?

Each holiday season I get more and more into crafting presents instead of buying presents. I also get more into gifting things that can be used up and made useful. These are a few crafts that, if you have the materials, are quick and easy to make and gift.

Cuticle Oil

Supplies:

  • small glass vials with roller applicator
  • Argon oil
  • Sweet almond oil
  • Lavender essential oil
  • Geranium essential oil
  • Vanilla essential oil
  • Dried chamomile and lavender flowers

I just mixed these up in the individual vials. You will only need a couple drops of each essential oil. Next, you will drop in some flowers; you don’t need many. This is really for visual interest. Then fill the vial a little over 1/3 full with the sweet almond oil. Top off the vial with argon oil and cap with the roller ball applicator. Voila!

Relaxing Bath Salts

Supplies:

  • small organza bags
  • bath salts
  • dried lavender flowers
  • dried camomile flowers
  • lavender essential oil (optional)

If you are making many, then mixing up the salts, dried flowers and essential oil in a large bowl might be worthwhile, otherwise you can just spoon the ingredients directly into the baggies. I use one or two drops of essential oil per baggie and then tie the bags tightly closed by knotting the drawstring ribbons. These ribbons can serve as a way to hang the bag on the tub faucet so the water will run through. The only hiccough I ran into with gifting these is that not many of my friends ever take baths.

Wax Sachets

Supplies:

  • Soy based candle wax
  • A mold of some kind
  • Whole spices: clove, star anise, dried orange wheels, lavender flowers, broken cinnamon stick
  • Ribbon
  • A container and pot to melt the wax
  • Essential oils: lavender, clove, cinnamon, orange

First, put water in your pan and put your container for melting wax over/in the water. Some people use a large measuring jug as their container, I just set a pot inside of another pot. You will want to use equipment dedicated to candle/soap/lotion making. I do not suggest using the same pots and containers that you use for cooking. Bring the water (in the outside container) to a simmer and allow your wax to melt.

While the wax is melting, pre-mix your essential oils to get the right balance. I used lavender, clove, cinnamon, and orange because that is the same combination I use for my room freshening spray in fall/winter. You can use anything that seems the nicest and most festive to you. You will also want to place some of your whole dried spices in your molds. I didn’t have anything fancy, so I wrapped old cardboard jewelry boxes in foil.

When the wax is melted pour it into your molds. You may want to place some additional spices after pouring, like the star anise and the orange wheel. I had placed all my spices in first, pouring the wax over-top, and some of them kind of got lost in the wax. Once the wax has hardened, heat up the end of a metal metal skewer to punch a hole for the ribbon (be sure you are using an oven mitt or pot holder to hold the skewer).

Simmering Potpourri

Supplies:

  • Whole spices: allspice berries, cinnamon sticks, dried orange wheels, clove buds, star anise, dried ginger, dried apple slices
  • Bottle or jar

This is supper simple! Just toss the tried spices together in a bowl. If your bottle are jar is a little on the small side then you may want to break up some of the orange wheels, cinnamon sticks, and apple slices. If the jar is big, you don’t have to worry about it. Divvy up the mix among your containers. When you gift this, I suggest including instructions: “Combine potpourri mix with water in a sauce pot. Place on the stove and bring to a simmer. Enjoy the smells!”

Harvest to making: a journey

Harvest to making: a journey published on No Comments on Harvest to making: a journey

First off, this is a learning journey where I ramble about a thing I tried. If anything, maybe it will help ya’ll get ideas or learn from my mistakes, but it is so not a tutorial to replicate.

I received three weak looking stalks of grass from a co-worker one spring. I planted them and by the next spring had a sizeable spray of pleasant smelling and surprisingly fierce lemongrass. This stuff will cut you up, seriously. So, I pulled it up and divided the clump into three, harvesting a handful of it without really knowing what I was going to do.

After pondering for a while, I decided to make a tea that I could add to moisturizers, astringents, and facial refreshers that I was making.

A.) not ready yet B.) this is fragrant and ready C.) this is too far and smells like old tea

Of course I looked online for ideas and no, I wasn’t going to make a hydrosol or attempt to extract the essential oil, because I didn’t have the equipment or the patience for all that. A tea would be good enough. It wouldn’t necessarily have the shelf life of other permutations but I would deal with that.

And all of this would’ve been fine if I didn’t start by over steeping the tea. I don’t think it really ruined it for what I wanted, but it got way past the point where it smelled lovely like lemongrass cosmetics. The first thing I did, of course was clean the stalks off. Then I bruised them and chopped them up and put them in a big ole pot of water to simmer slowly. I can’t even tell you how long but I did remember to take pictures of the process. Pic B would’ve been perfect. Pic C was overcooked, really, but was like tea that you’d get from a teabag when making the concentrate for iced tea, complete with the oils that sort of float on top before you dilute it with an equal amount of water.

So, in the end I did use it, but not all of it, to make a nice facial wash and it was sort of pleasant. Lemongrass is an anti-microbial, anti-bacterial, and fungicidal herb, so it is really good at warding off infections, acne, rashes, etc. Lemongrass tea can also be drunk, of course, but I made it a bit too strong and that lovely aroma just sort of ends up tasting like soap in large quantities.

The three bunches of lemongrass that I replanted after dividing are now as big as the original clump and it’s only been a season. I’m going to have to get better at using it for all sorts of things. And, I’m going to need to get some gauntlet gloves probably. The cuts from lemongrass aren’t quite as bad as when a pineapple gets ya, but they are much harder to avoid.

Primary Sidebar