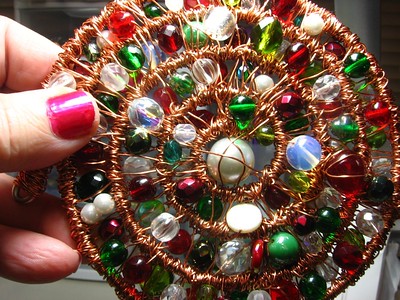
Sitting and meditatively doing a craft that will become a Christmas present or bauble is one of my favorite preparations for the holidays. I used up the supplies I bought to recreate and/or supplement the beaded ornament I inherited from my grandmother (Inspired by vintage ornaments). Now I have been scoping out various ideas online:
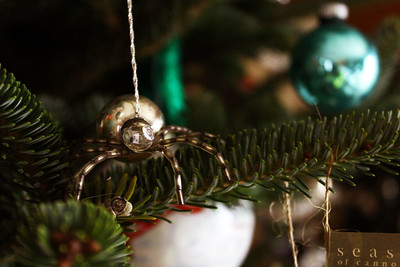
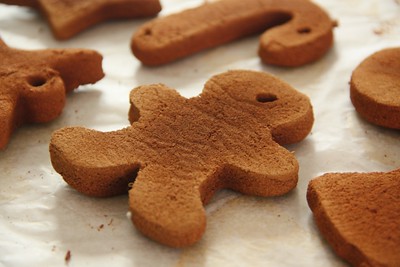
I love the smell of the cinnamon ornaments, so maybe I will do this again. They also make great present decorations. I also feel like my tree might need more spiders.
I might also make Bami Ballen again (Holiday Crafting: Bami Ballen), but will likely not make crackers this year (Holiday crafting: crackers). These are most definitely gifts since all the surprise is gone when you make them for yourself. Otherwise, I will be baking. The fruit cake is done, but there is matzo toffee to make and stuffed dates.
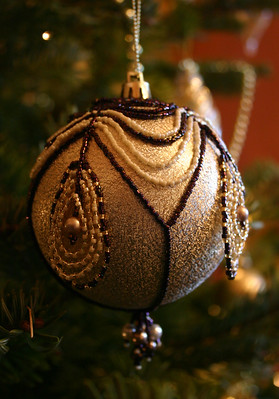
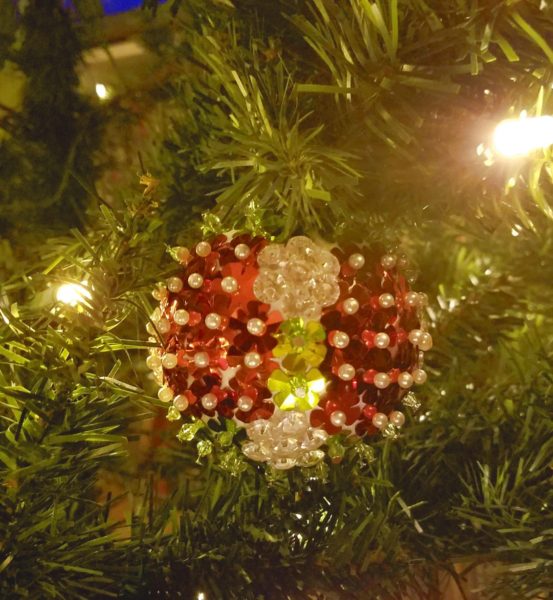
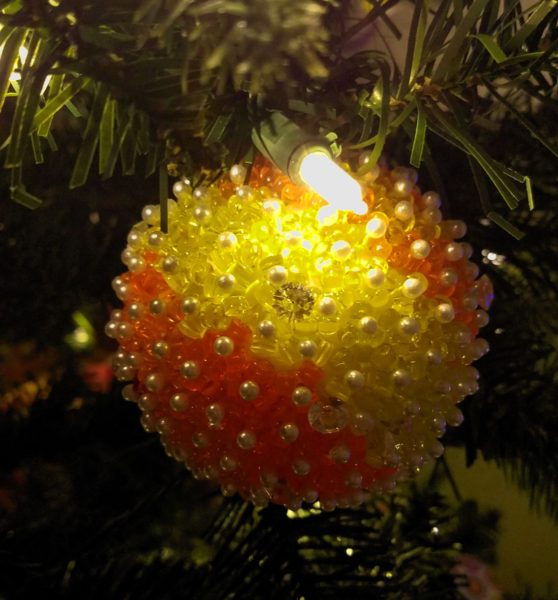
I have a lovely pony bead and pin ornament that my grandmother made long ago and it inspired me to try my hand at this holiday craft. All that is needed is a Styrofoam ball, straight pins, Pony beads, and patience.
Pony beads or three-cornered beads are still obtainable online, perhaps even in your local craft store. I quickly found out that my general flat head pins would not hold the bead in, so I focused primarily on using pearl head pins to affix the beads to the Styrofoam. I also picked up some crystal headed pins from a wedding supplies shop and wanted to do a disco ball like ornament but soon found that longer needle length is not a good thing in this craft. They end up competing for space inside the foam ball and eventually no more pins can be added.
These are light weight for having pretty decent visual impact and are very meditative to do in the evening.
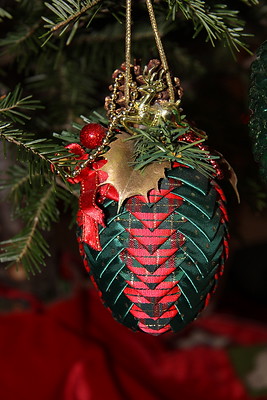
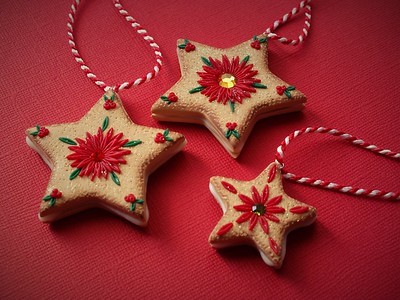
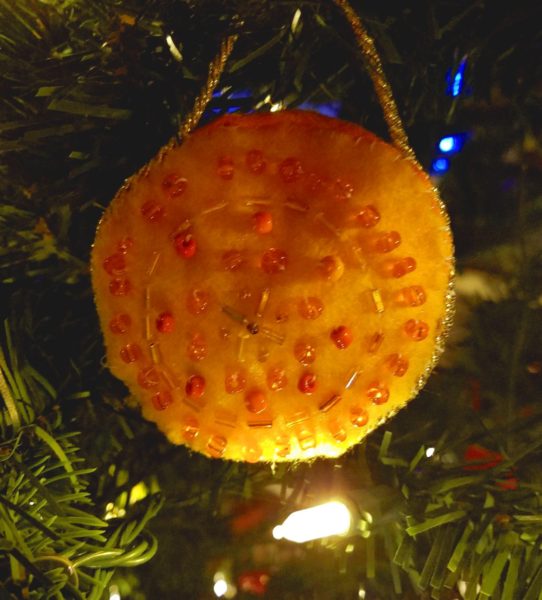
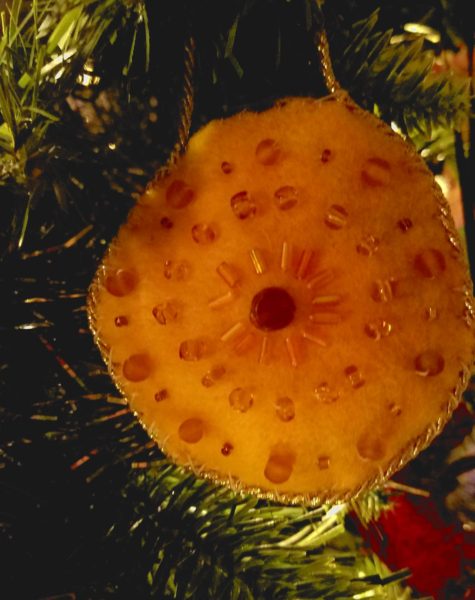
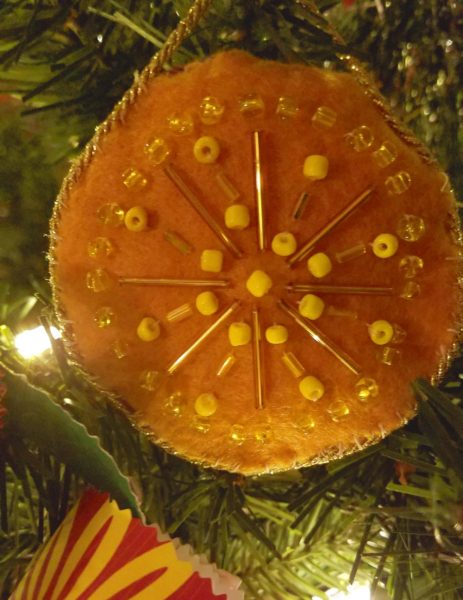
The next set of ornaments that I tried my hand at were inspired by a picture my friend sent from an Indy shop: stuffed and beaded soft ornaments. I think the inspiration was a shinier tighter weave, but I thought felt would hold it’s shape nicely. I based my designs on the sun in honor of solar holidays like Saturnalia and Yule, celebrating the sun on the shortest day of the year. In the end, they kind of ended up looking like cookies though.
This is also a very meditative craft. I got to use up a bunch of beads in my closet and I stuffed the ornaments lightly with the felt scraps from cutting out the circles. I also put a clove bud in each one for a hint of holiday smells.
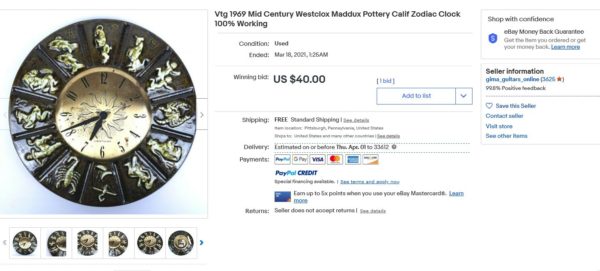
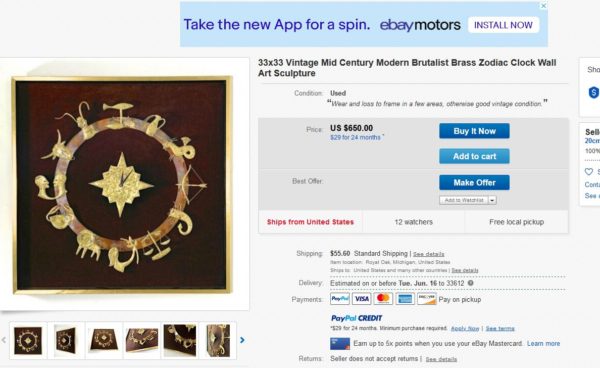
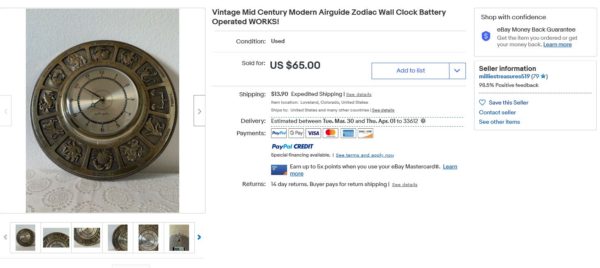
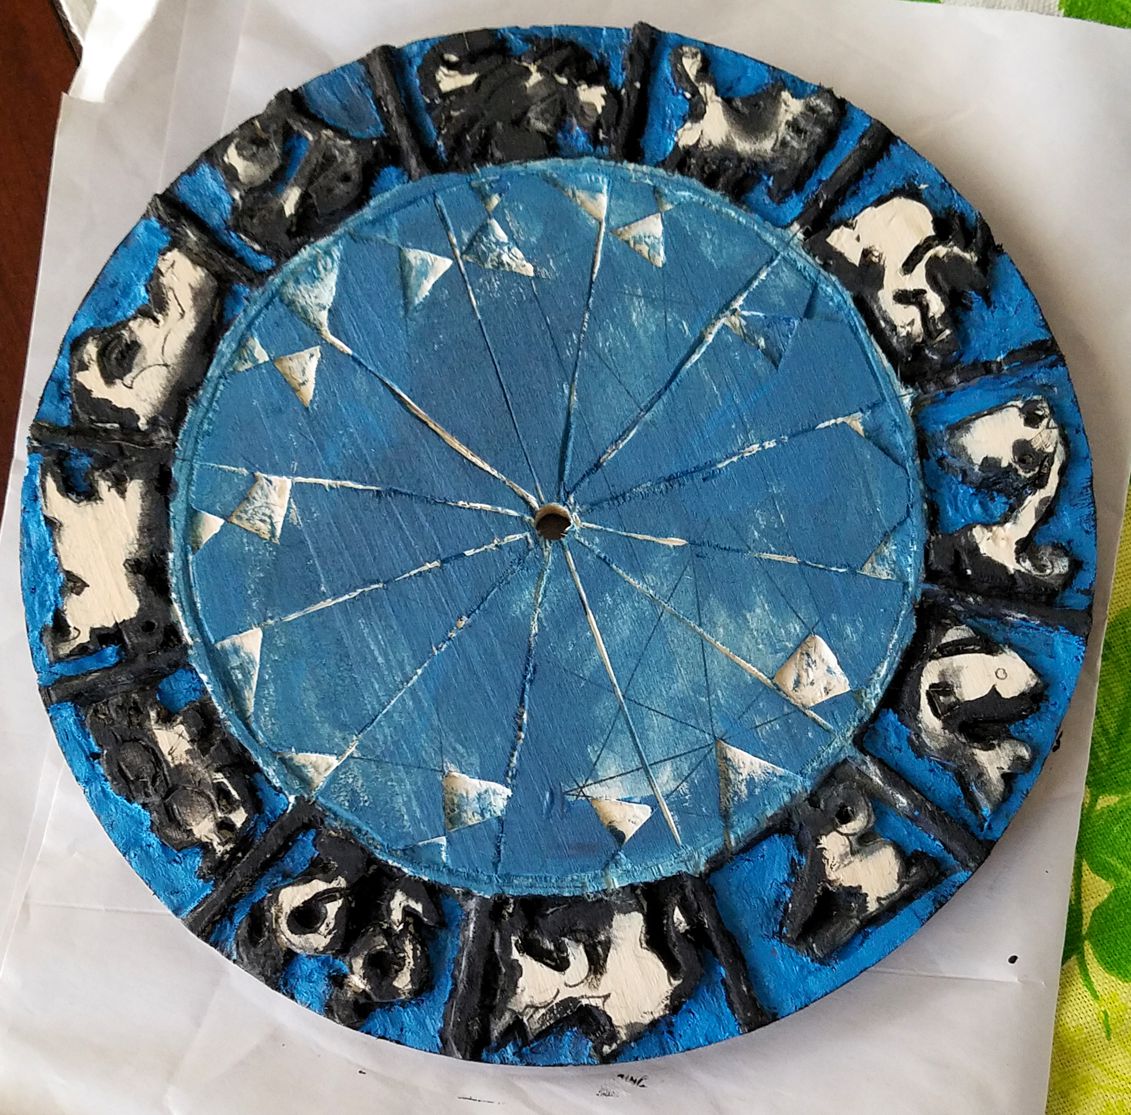
While visiting some of our excellent thrift stores I noticed a couple of mid century clocks with the zodiac arranged on the face. I was intrigued, I would have never suspected mainstream interest in the zodiac during the 40s and 50s. Unfortunately, I didn’t have my camera with me when we were shopping, but I did follow up with a search on eBay and found some more examples:
Of course, the more I thought about it, the more I wanted one of my own for my mid century house. It just so happened I had a clock face wood blank and a clock kit that I had inherited from my mother’s craft supplies.
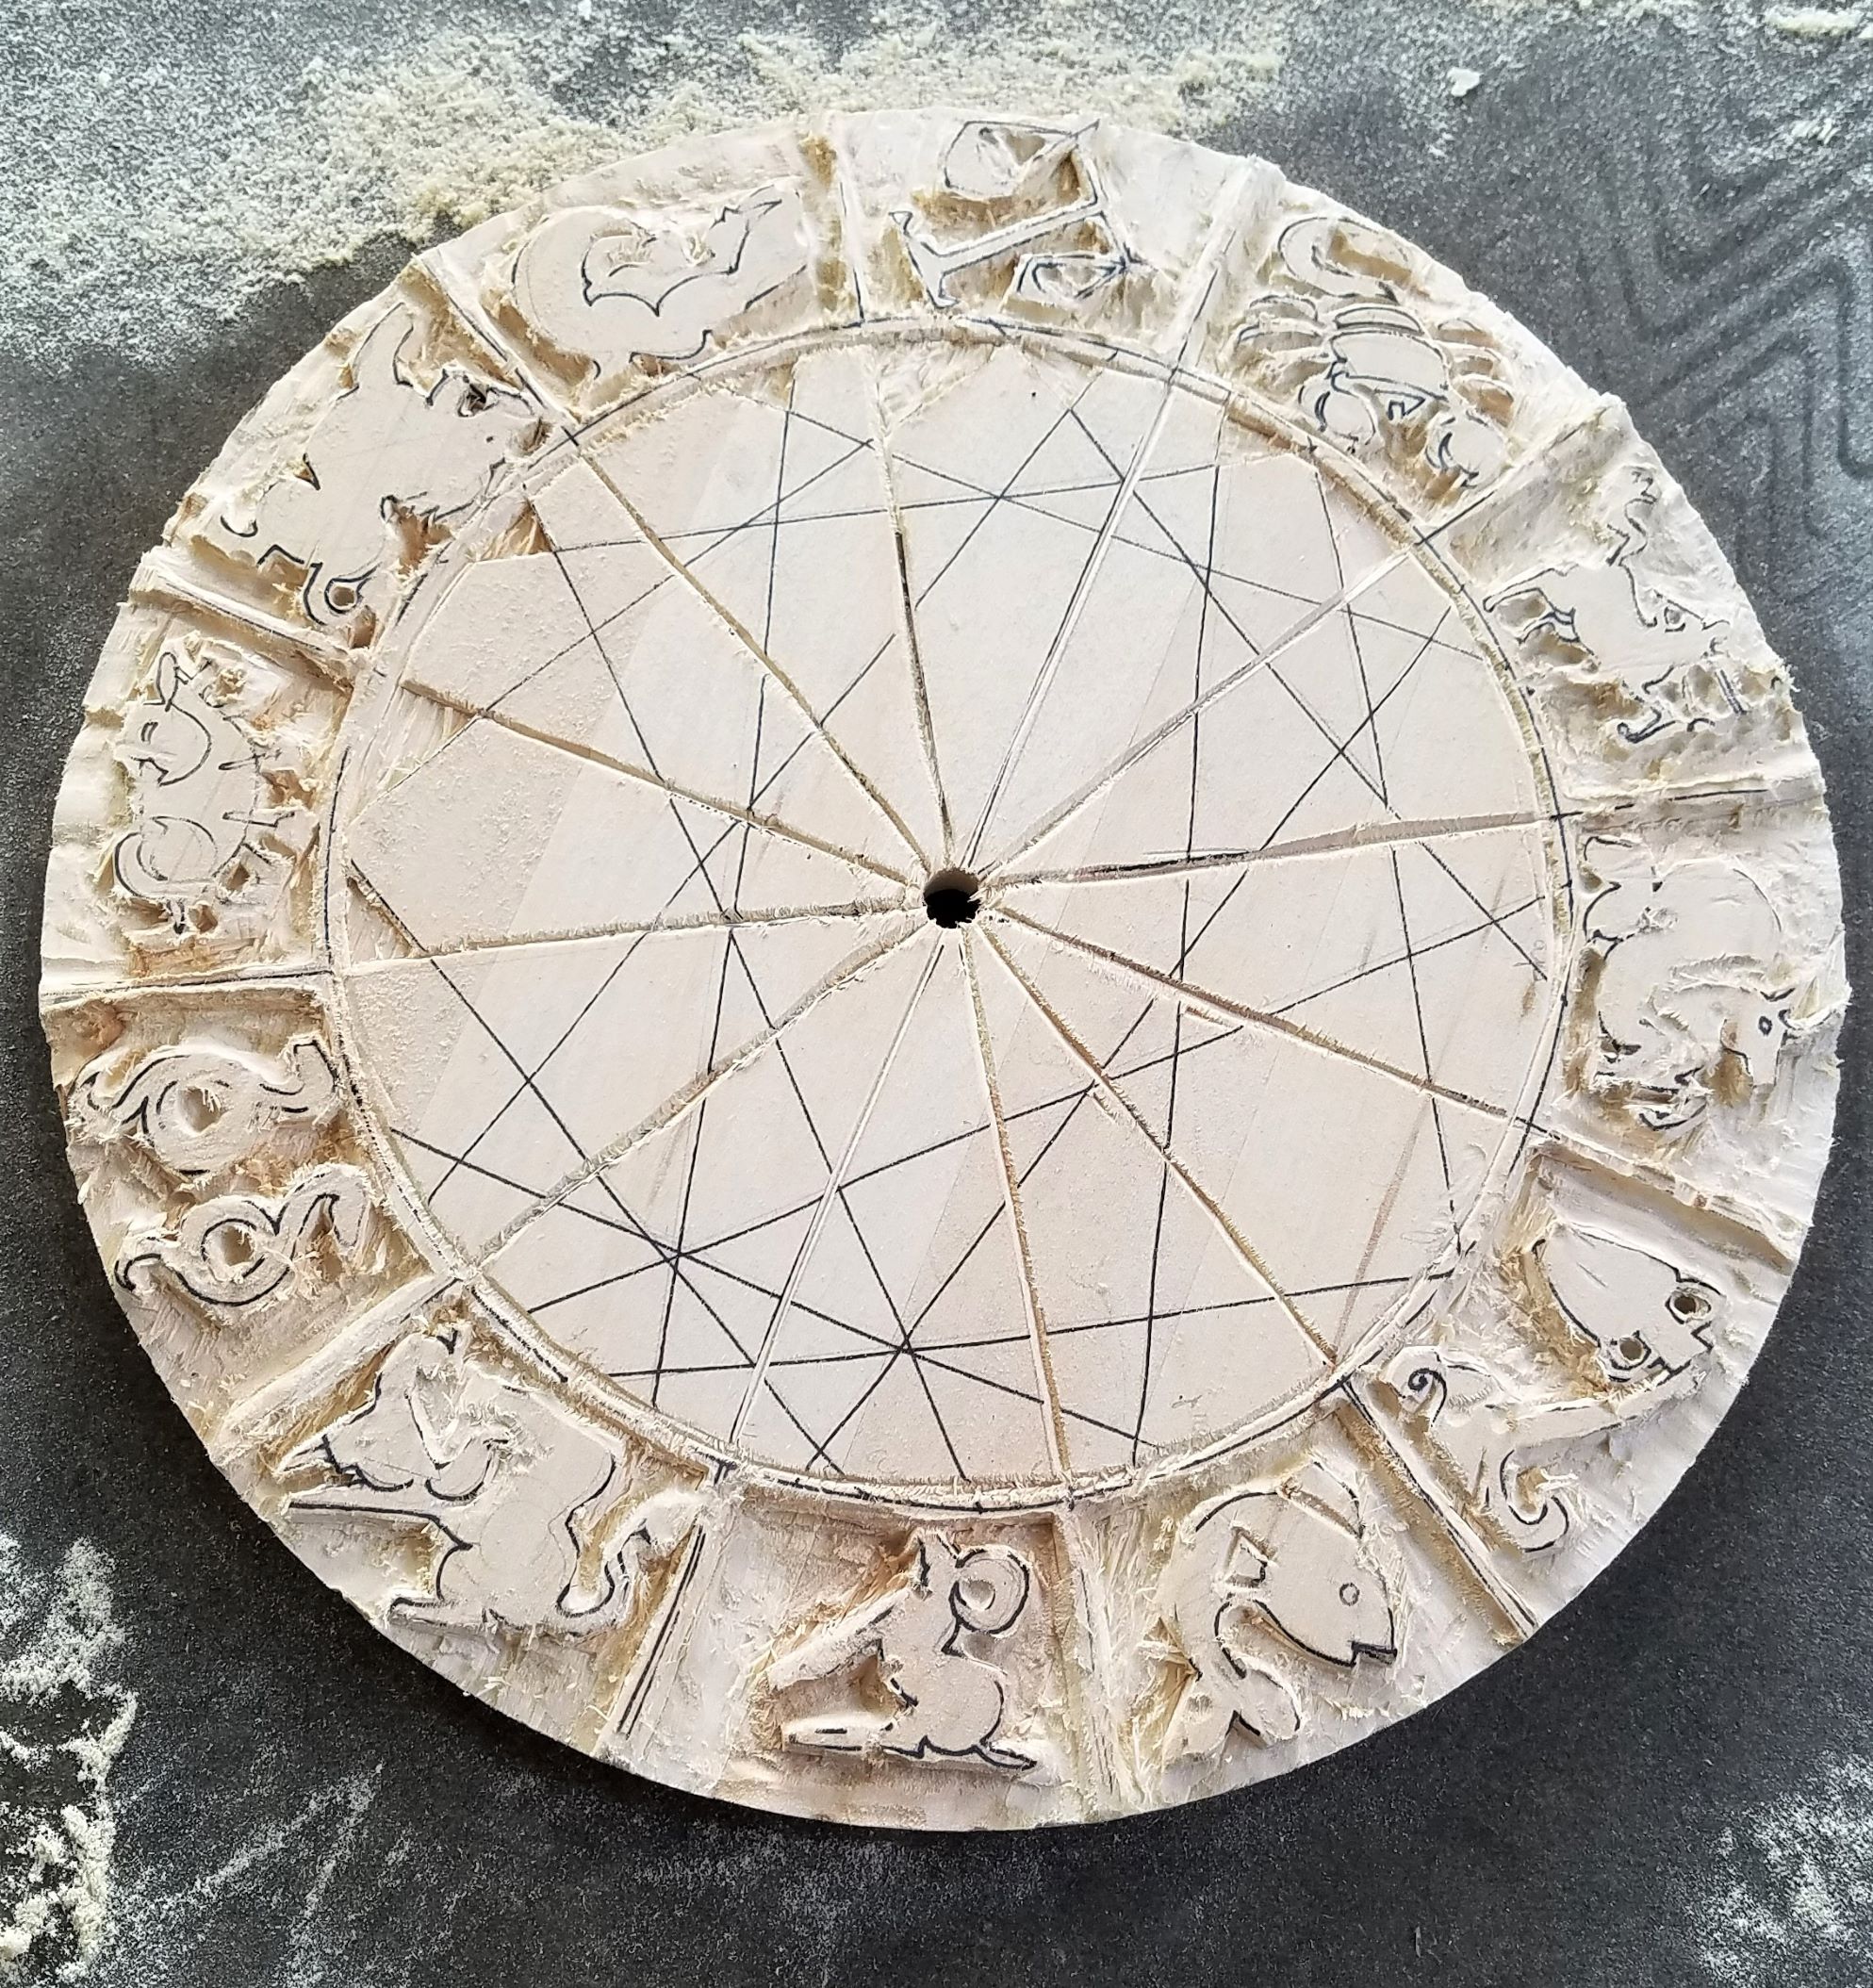
As to the design, I noticed that there didn’t seem to be too much consistency in how the zodiac is arranged in reference to the hours display. Each of the examples I found starts in a different place. I decided to start mine where the zodiac signs would roughly line up if every hour were representative of the month of the year. I didn’t include a separate sectioning out of the clock face for the numbering so the dividing lines between zodiac signs serve as my hour marks. This effectively shifts the signs forward a bit, but the signs themselves do not start when the month starts so I was happy.
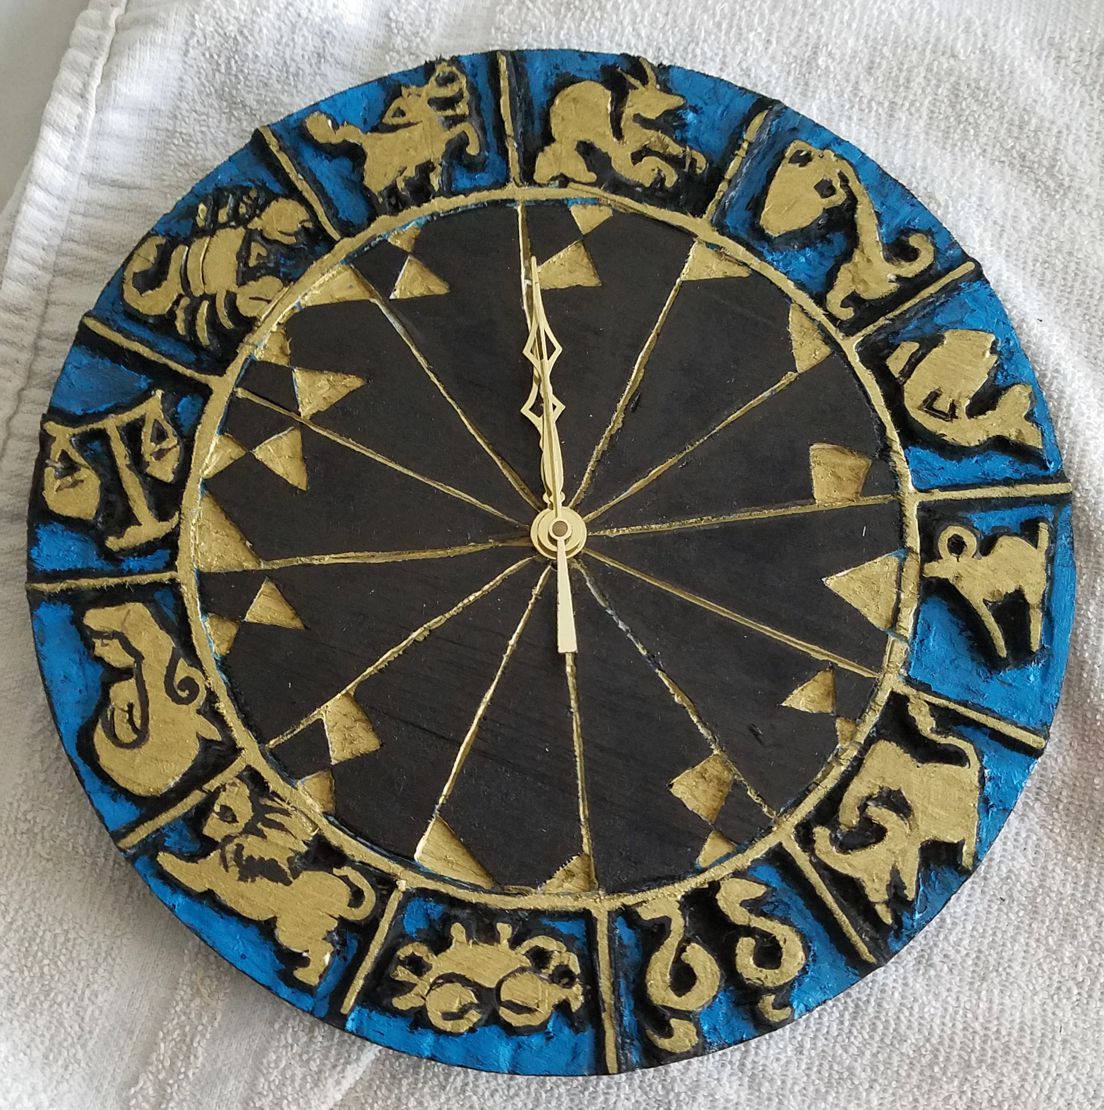
Early stagestiny stepsfirst bits of colorfinal result
Overall, I am pretty happy with it. It was a soft, cheap wood that either flaked away in large chips with hand tools, or feathered up with a rotary carver. This forced me to change my design dreams a little and accept a less finely detailed result. I used paint to highlight the simple relief and cover carving mistakes. If I had been seeking out new supplies for this project, I would’ve made sure to obtain a harder wood that would’ve been more conducive to carving. Part of my pleasure in finishing this up, however, is most definitely tied to using material I already had in the house.
Hello again, friends. I’m here with the latest installment of LeEtta’s gonna try something new, and also, making stuff with garbage. Now…picture it: central Florida 2015. A couple has moved into a 1949 block house with original bathrooms and tile floors, and spent their first winter in a house they would later call an icebox. To prepare for the next winter they get a couple more area rugs before turning their attention to the enormous fireplace in their living room.
But, even if the house is chilly during the season that Florida calls winter, it isn’t chilly enough, or chilly for long enough, for a full blown wood crackling fire. So, they outfit their fire place with pillar candles and light them up on the colder nights. Eventually they burn through 6 to or more a season.
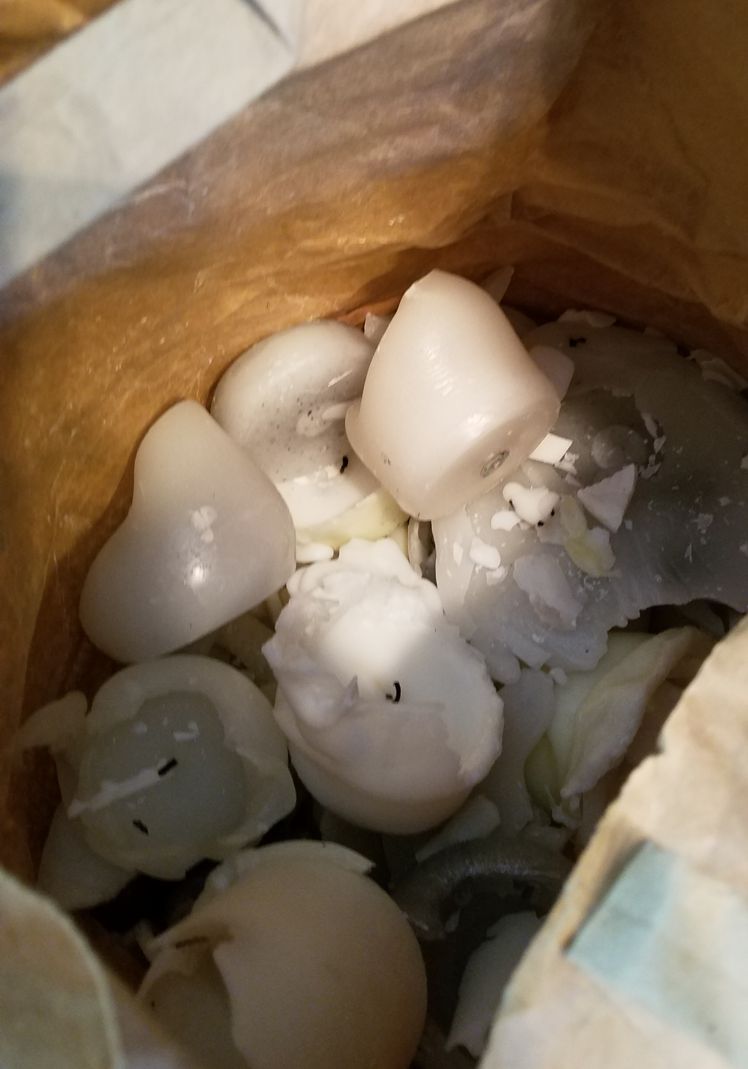
And this is where I got really sick of tossing candle bottoms. I am sad to say I tossed a few before I cried fowl and started collecting them with the intent to reuse them somehow. Searching online I found no shortage of people doing the same. Around the same time I inherited a good deal of my grandmother’s craft stash which included a bag full of wicks. The planets had aligned.
Full confession, this year is not the first year I have tried this; it is the second. But it is the first year I felt like I had some tricks up my sleeve to share with you.
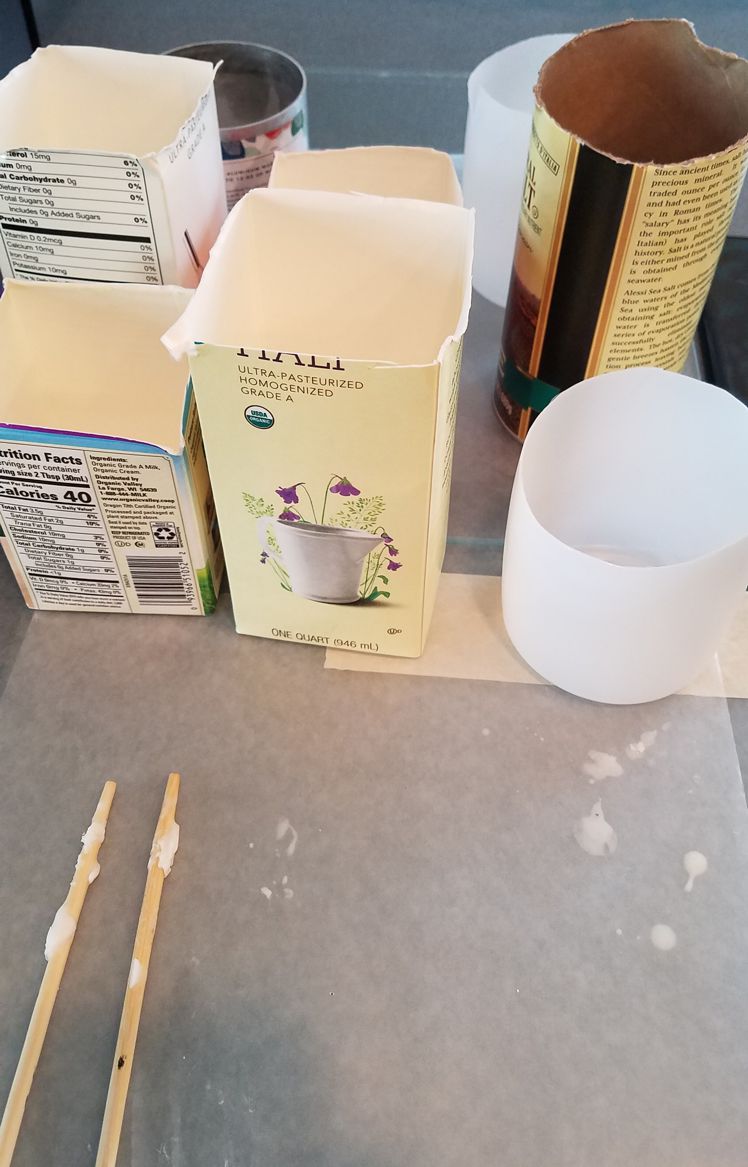
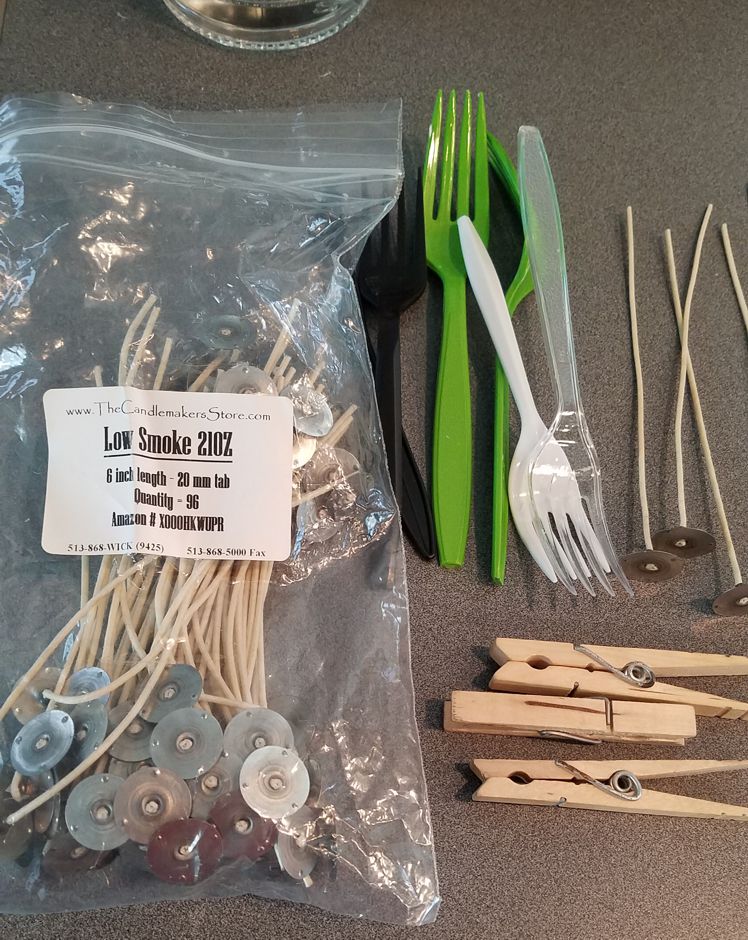
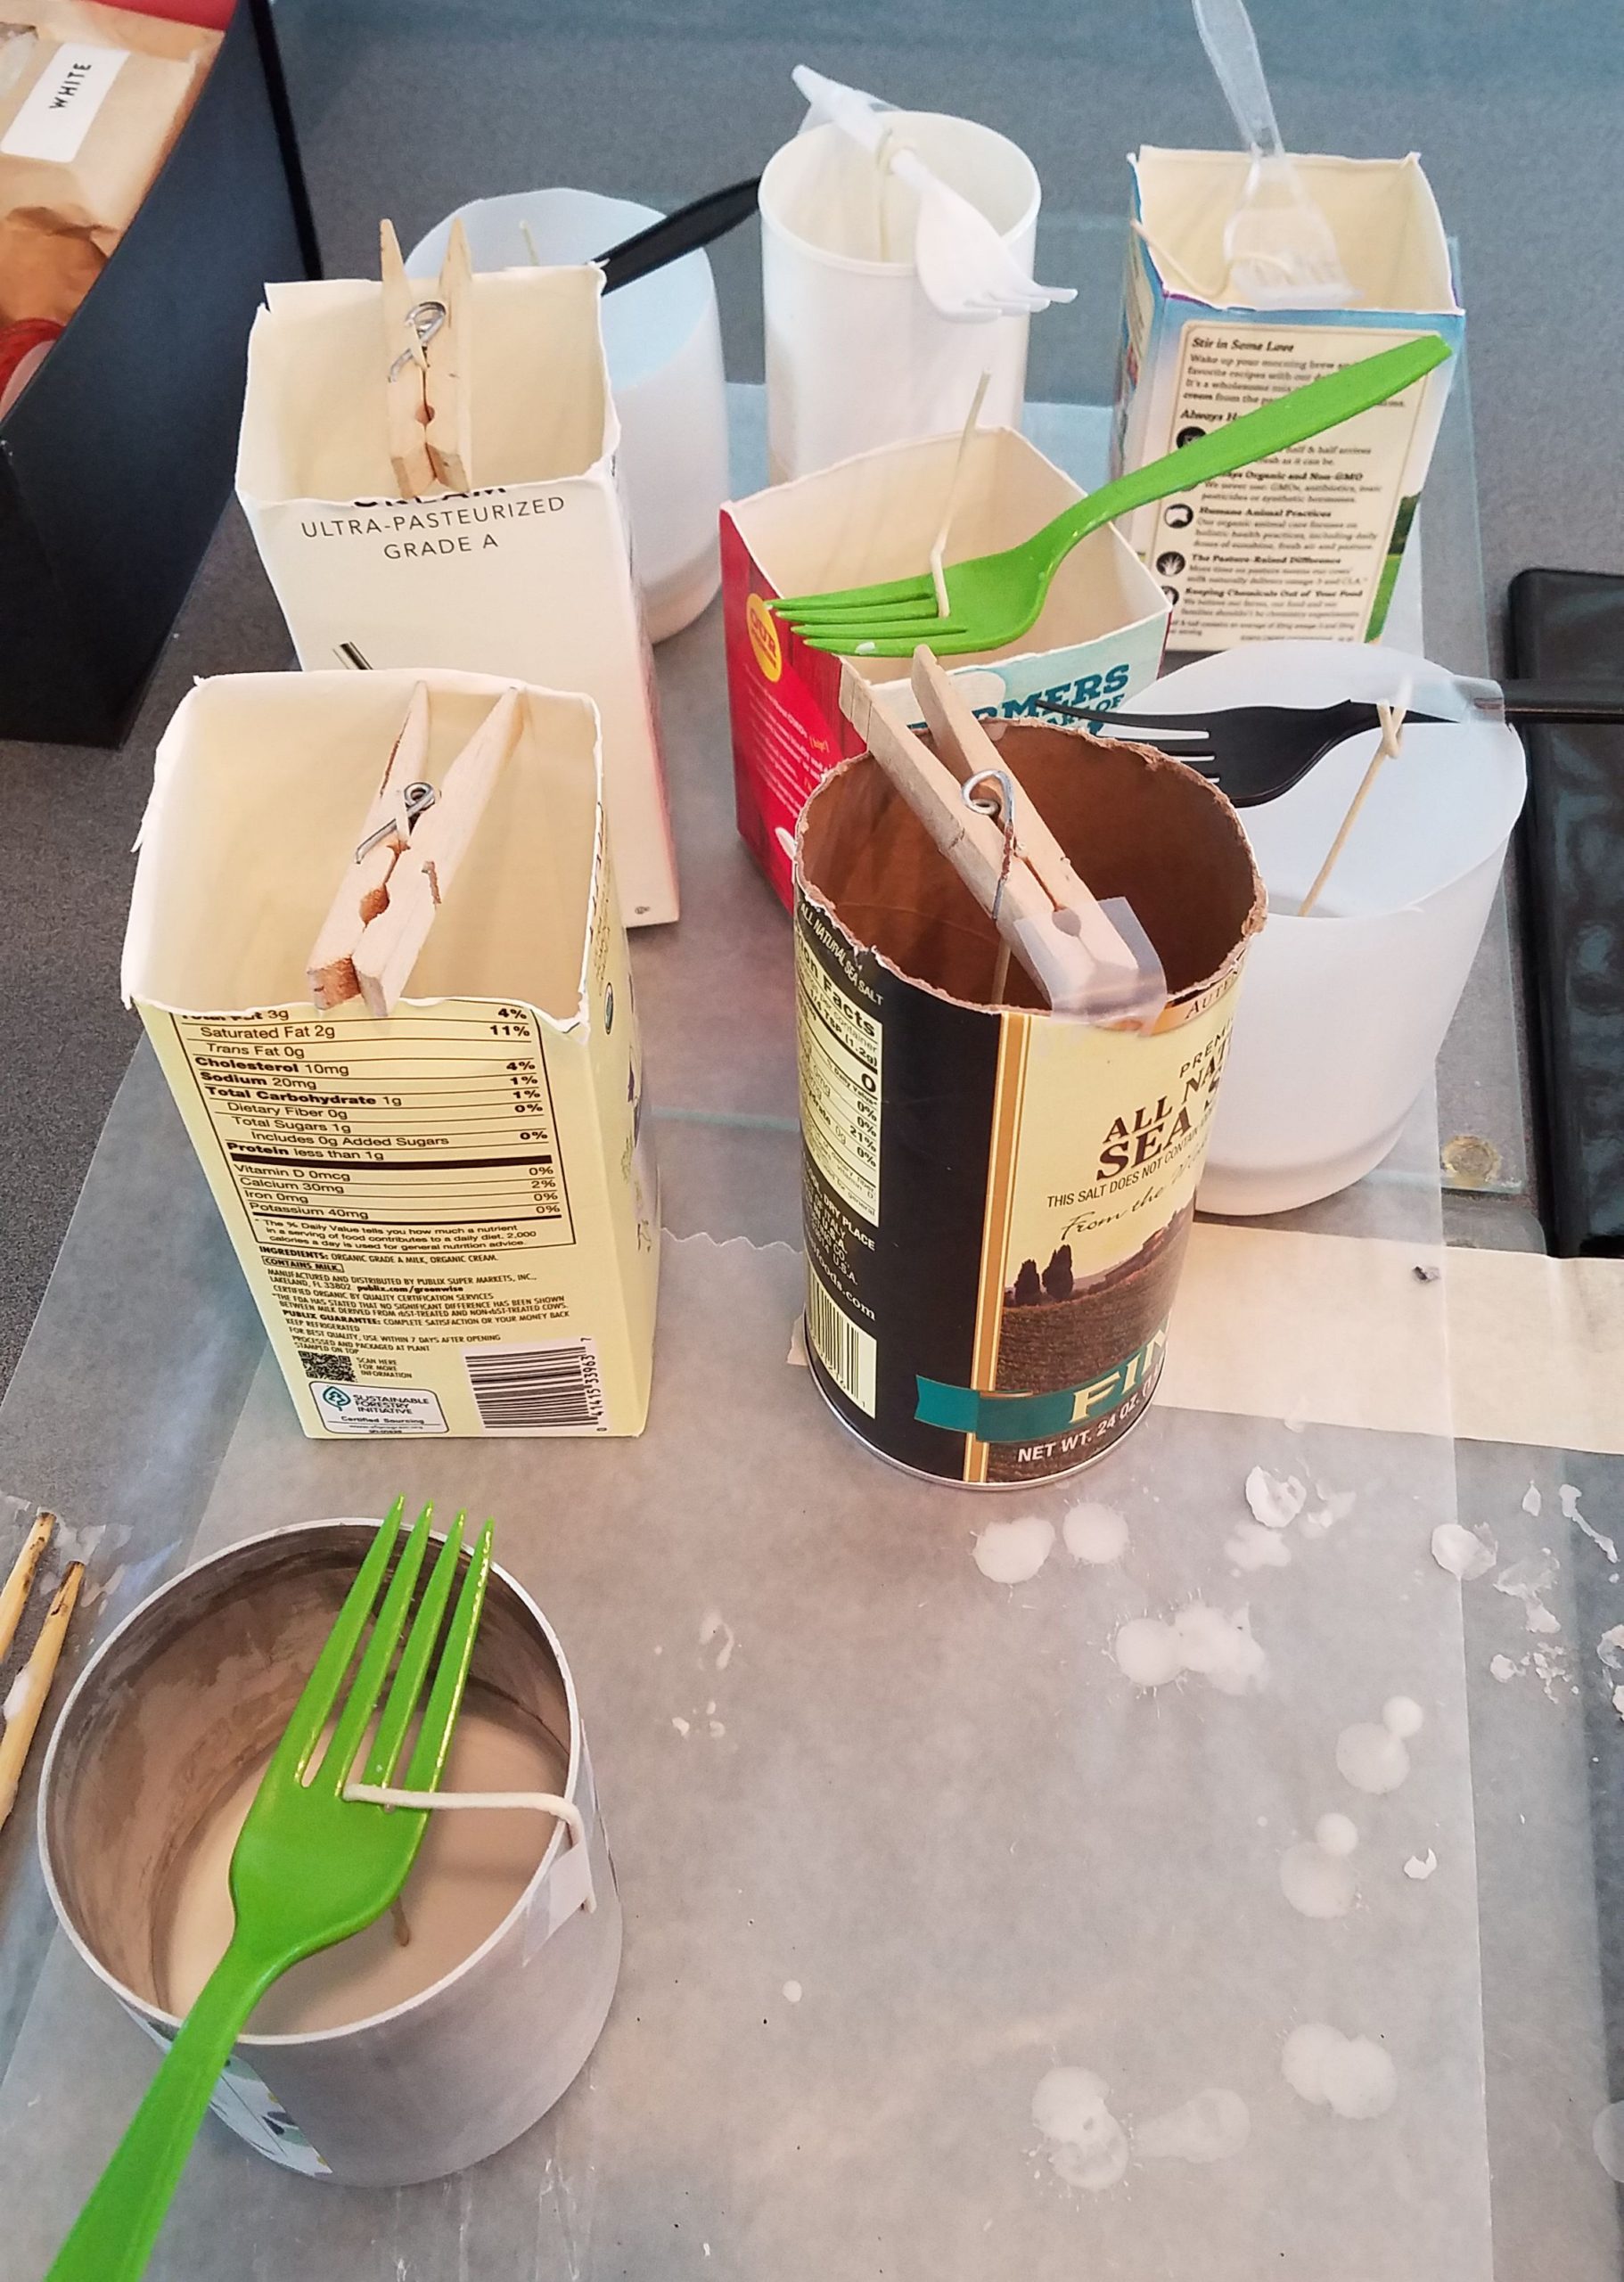
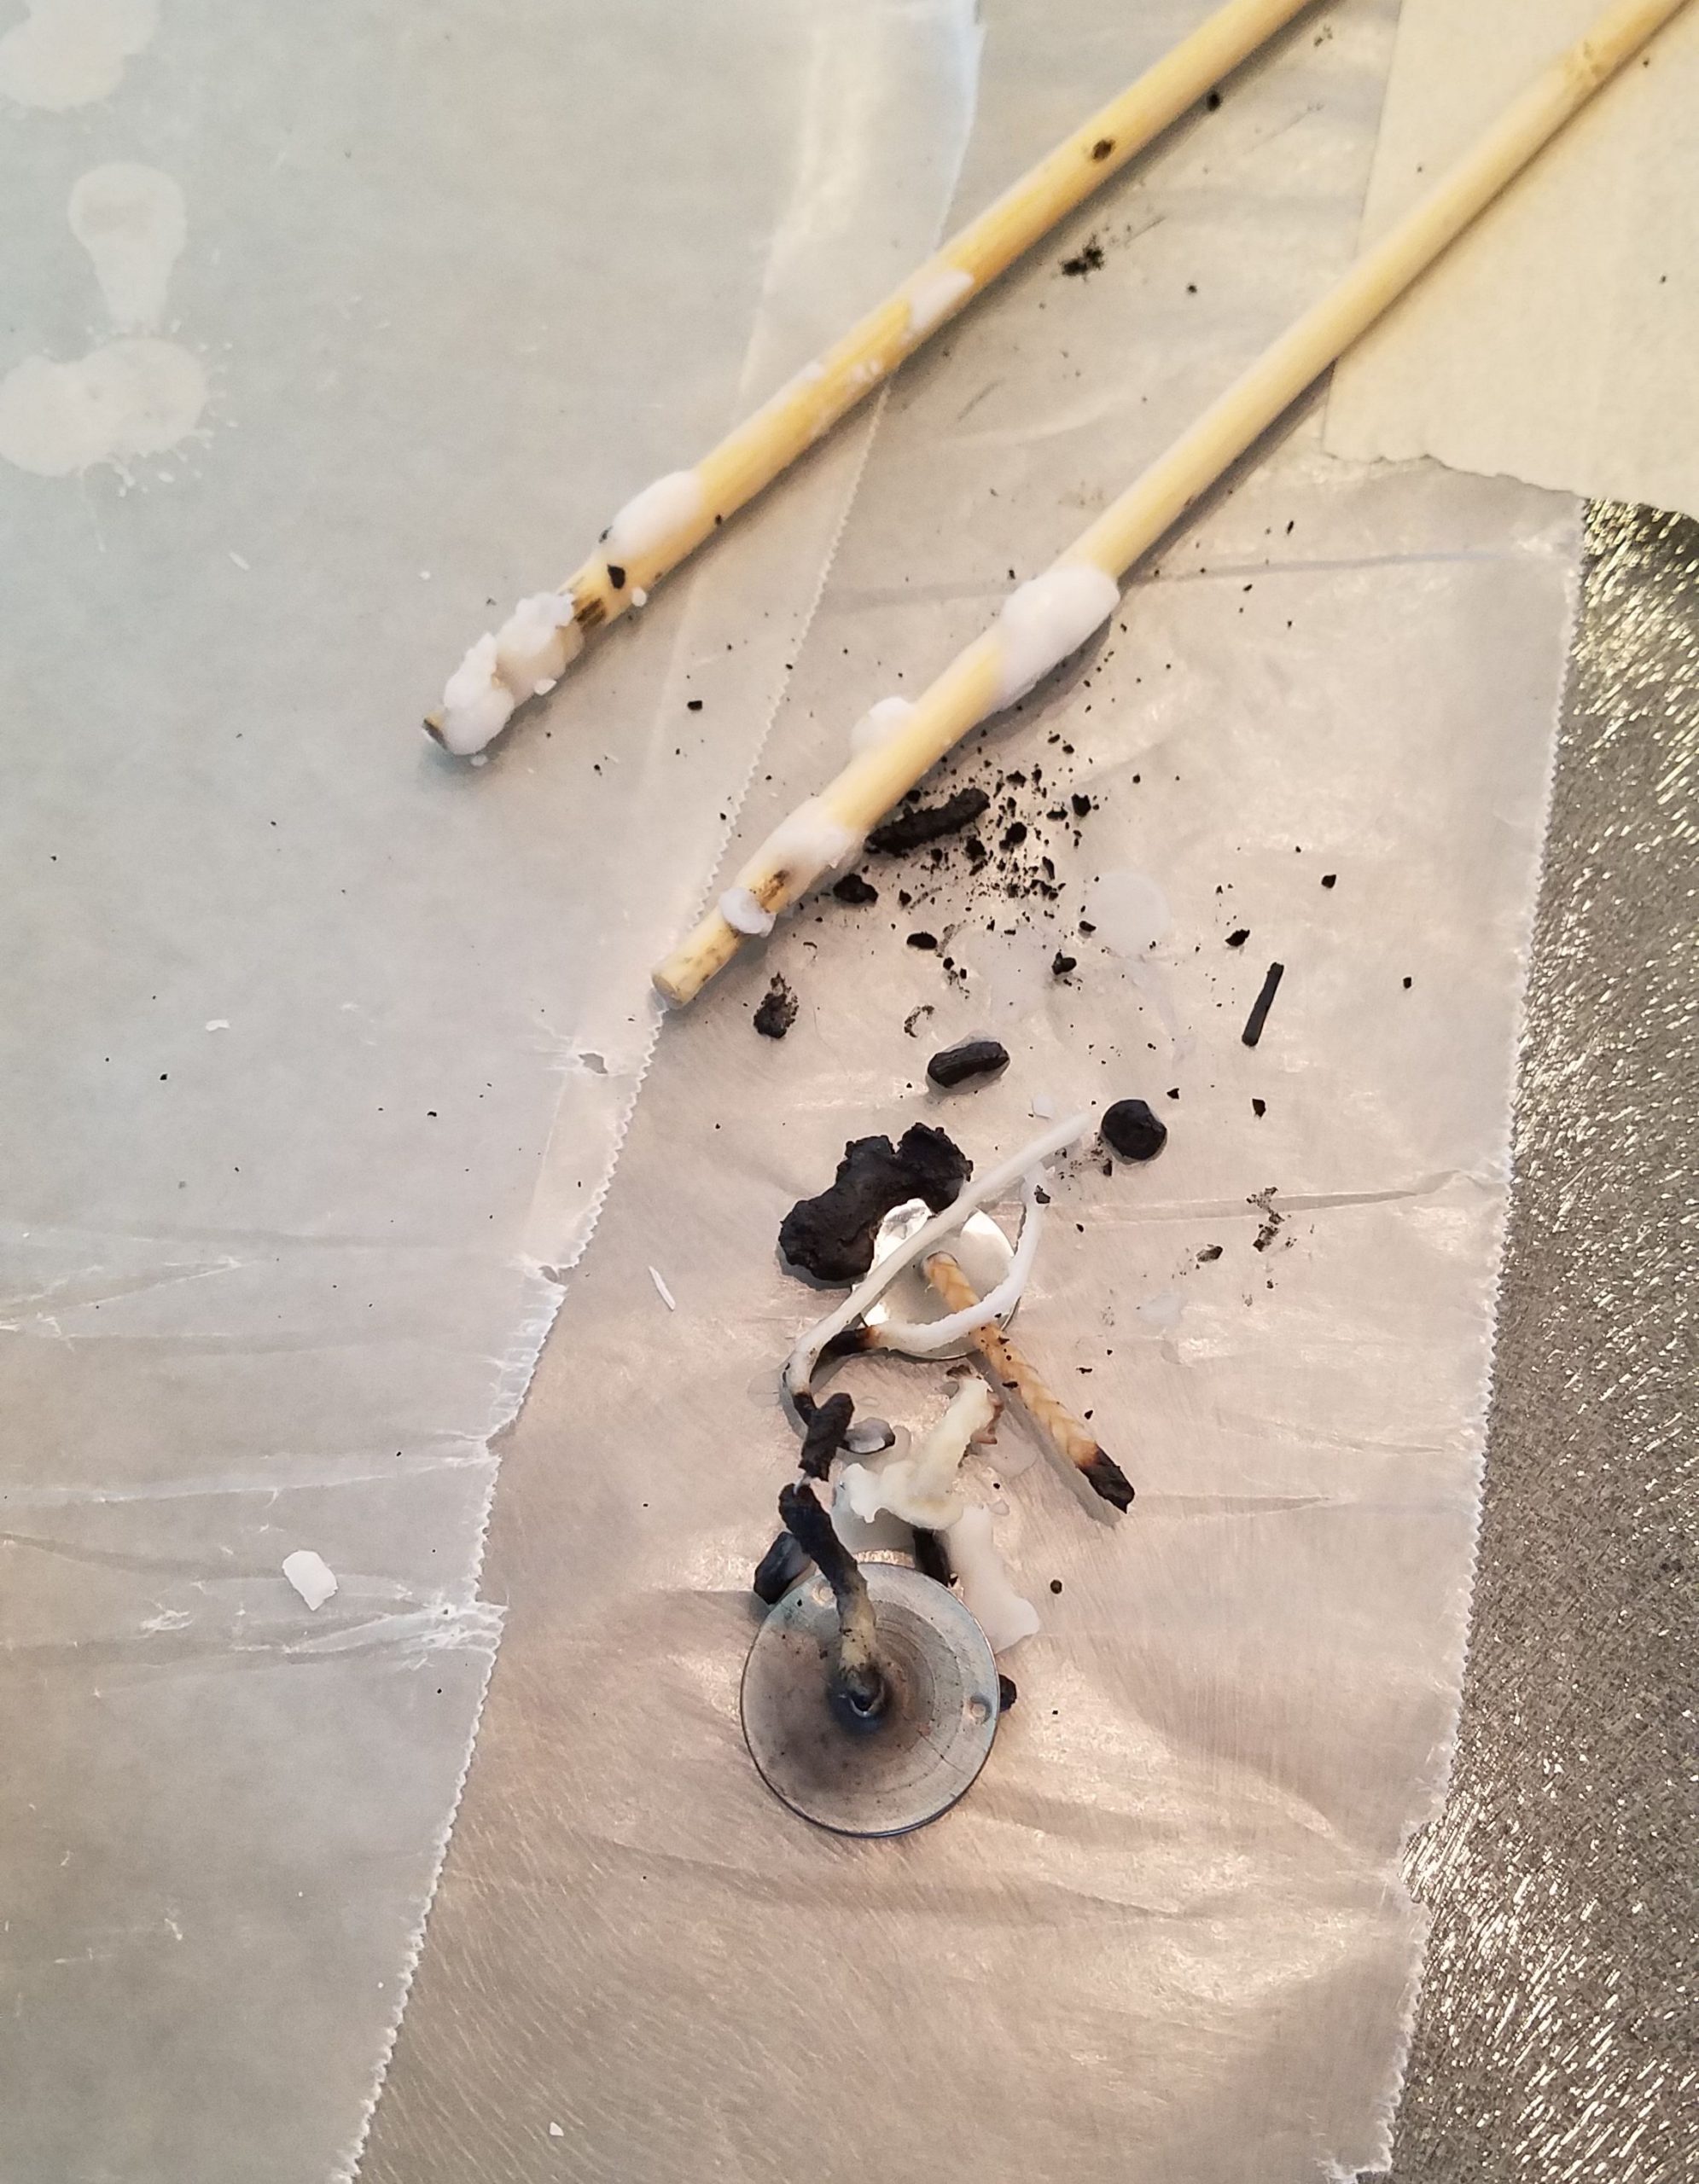
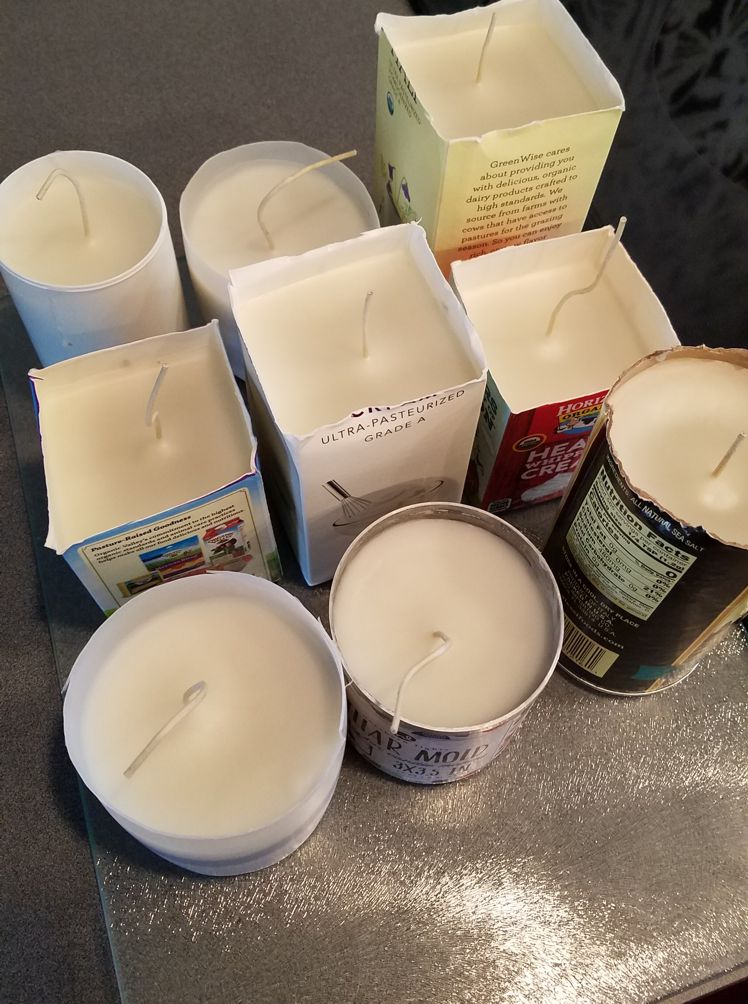
I am only extravagant enough to have purchased one mold, so I washed and saved up creamer containers as well.I have been adding to this bag, without really taking away from it, for a couple years.Other supplies: the wicks, and various materials to hold them straight.During the pouring.Chopsticks come in handy for removing charred bits and wick ends.Cooling after pouring.The final product.
My first trick was, of course, saving more trash in order to help with this process. I only bought one pillar candle mold from the store. I didn’t really want more, and I especially didn’t want to find a place to keep any more. So, I saved up some half ‘n half, heavy cream, and salt containers of both plastic and cardboard variety.
If you happen to have a similar internet bubble to me, then you’ll have seen loom DIY and loom weaving rise in popularity. I have recently caved to the phenomena and acquired a loom for myself. I thought it would be a wonderful and more expedient way to use up the yarn collection that lives in a corner of my guest room. It’s not that I don’t like knitting or crochet. I find the process of creating fabric from string really fascinating no matter what method. However, I sometimes lack patience and knit and crochet pieces seem to take so long.
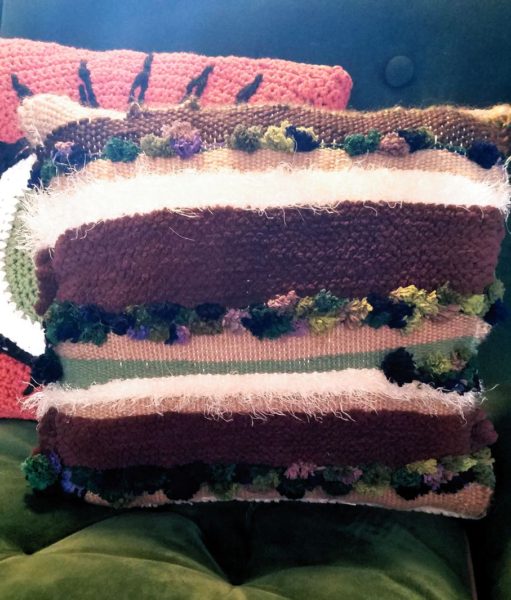
I found weaving to be much faster, and less stretchy – for those projects that might require a little more stiffness. I used up a bunch of yarn remnants in my first experiment: a pillow cover. I had to reinforce the sides with some backing fabric, which is also where I attached the zipper. I am very pleased with it and look forward to learning some weaving stitches and techniques.
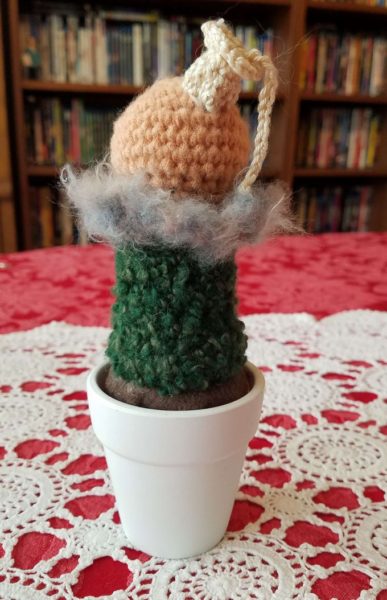
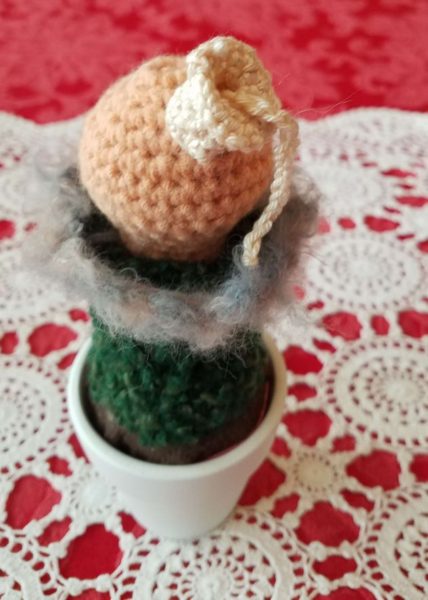
A while ago I made a kind of free-form crochet succulent sculpture. At the time I was super inspired by amigurumi and food and plants that were made out of non food and non plant materials. I still love things that look like something which they are not. Anyway, this little plush thing has been beating around various cupboards until I had a realization. I am terrible at house plants.
I try to keep some houseplants. I had a succulent display on my desk for a short while until I transitioned to work from home. Once I had that plant at home it died superfast. So, I decided to pot up my plush crochet sculpture as a replacement for an office succulent. All this really entailed was carving up a left-over Styrofoam ball from a Christmas ornaments project, cutting and gluing some felt, and cleaning up a used tiny succulent pot from a long deceased house plant. Voila! a desk plant/house plant I can’t kill!
You may have noticed the uptick in crafty blogging lately. I did a whole bunch of making prior to the holidays. Some of the the makes were for gifts and some were for decoration. I really enjoyed myself and I feel like I am returning to a more makery me. Crafty posts may continue.
I was gifted a glass bottle cutting kit at the end of 2020 and the two first crafts I wanted to tackle were bottle bottom candles and bottle chimes. I had bought a bottle chime for our house a while ago. It has a chain running through it from the hanging ring through the clapper and down to the wind catch. I also scoped out some tutorials online that used hot clue and rope, but in the end, used the bottle chime I had as a pattern.
I knew rope and glue wouldn’t make it through a Florida summer. Florida summers have even eaten through the small gauge chain in a lot of my store bought windchimes, contributing to a pile of chimes that I have to repair. Given that the glass would shatter if the rope/chain breaks, I thought it would be better to be hefty than dainty.
I used large wooden beads as the stopper inside that holds the bottle at the right height and the clapper. The beads are attached to the chain pieces with heavy gauge craft wire. For the hanging loop, I used some keyrings that I had on hand. I am pretty happy with the results.
Each holiday season I get more and more into crafting presents instead of buying presents. I also get more into gifting things that can be used up and made useful. These are a few crafts that, if you have the materials, are quick and easy to make and gift.
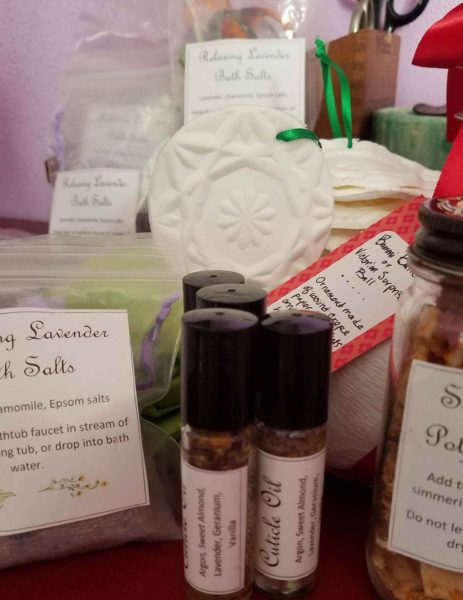
Cuticle Oil
Supplies:
small glass vials with roller applicator
Argon oil
Sweet almond oil
Lavender essential oil
Geranium essential oil
Vanilla essential oil
Dried chamomile and lavender flowers
I just mixed these up in the individual vials. You will only need a couple drops of each essential oil. Next, you will drop in some flowers; you don’t need many. This is really for visual interest. Then fill the vial a little over 1/3 full with the sweet almond oil. Top off the vial with argon oil and cap with the roller ball applicator. Voila!
Relaxing Bath Salts
Supplies:
small organza bags
bath salts
dried lavender flowers
dried camomile flowers
lavender essential oil (optional)
If you are making many, then mixing up the salts, dried flowers and essential oil in a large bowl might be worthwhile, otherwise you can just spoon the ingredients directly into the baggies. I use one or two drops of essential oil per baggie and then tie the bags tightly closed by knotting the drawstring ribbons. These ribbons can serve as a way to hang the bag on the tub faucet so the water will run through. The only hiccough I ran into with gifting these is that not many of my friends ever take baths.
First, put water in your pan and put your container for melting wax over/in the water. Some people use a large measuring jug as their container, I just set a pot inside of another pot. You will want to use equipment dedicated to candle/soap/lotion making. I do not suggest using the same pots and containers that you use for cooking. Bring the water (in the outside container) to a simmer and allow your wax to melt.
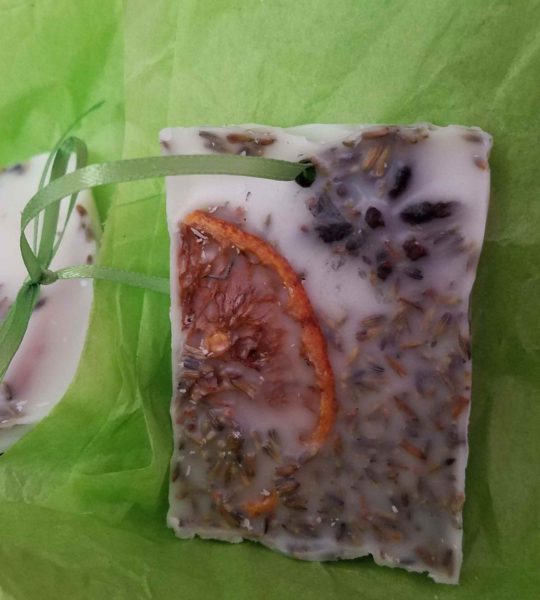
While the wax is melting, pre-mix your essential oils to get the right balance. I used lavender, clove, cinnamon, and orange because that is the same combination I use for my room freshening spray in fall/winter. You can use anything that seems the nicest and most festive to you. You will also want to place some of your whole dried spices in your molds. I didn’t have anything fancy, so I wrapped old cardboard jewelry boxes in foil.
When the wax is melted pour it into your molds. You may want to place some additional spices after pouring, like the star anise and the orange wheel. I had placed all my spices in first, pouring the wax over-top, and some of them kind of got lost in the wax. Once the wax has hardened, heat up the end of a metal metal skewer to punch a hole for the ribbon (be sure you are using an oven mitt or pot holder to hold the skewer).
Simmering Potpourri
Supplies:
Whole spices: allspice berries, cinnamon sticks, dried orange wheels, clove buds, star anise, dried ginger, dried apple slices
Bottle or jar
This is supper simple! Just toss the tried spices together in a bowl. If your bottle are jar is a little on the small side then you may want to break up some of the orange wheels, cinnamon sticks, and apple slices. If the jar is big, you don’t have to worry about it. Divvy up the mix among your containers. When you gift this, I suggest including instructions: “Combine potpourri mix with water in a sauce pot. Place on the stove and bring to a simmer. Enjoy the smells!”
I am not sure where I first learned the name Bami Ballen. When I searched for them by that name after having obtained my first store bought Bami Ballen, I could find precious little online. There are a few more people calling it by that name now, but mostly they are sold as surprise balls.
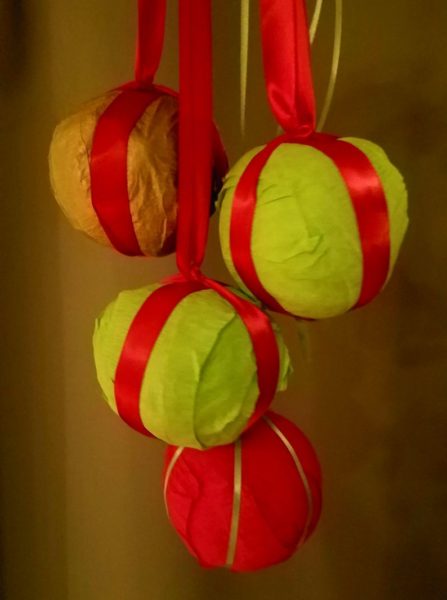
Surprise balls are comprised of a wound up ball of crepe paper ribbon surrounding trinkets and treats inside.
YOU WILL NEED
Crepe paper streamers
Trinkets
Ribbon
One crepe paper streamer of the type you can pick up in a craft store was all I needed for each of these. The resulting bami ballen are a little smaller than some store-bought versions, but not much. They are a pretty normal ornament size, and can be hung on a tree as decoration until it is time to unwind them.
To make them, you just wind the crepe paper round, adding a bunch of layers in between each trinket. I use the trinkets to help me build out the shape. Eventually, you will be able to compress it into a ball shape with your hands, if your ballen is a bit wonky shaped. I suggest keeping slender items like fortunes, jokes, and fortune fish to the outsides where they can easily wrap around the ball shape.
When you have wrapped up all your crepe paper, then secure the whole thing with a ribbon that can also serve as a hanger loop. I tend to gift mine with a little explanatory tag, just in case the recipient has never heard of them before.
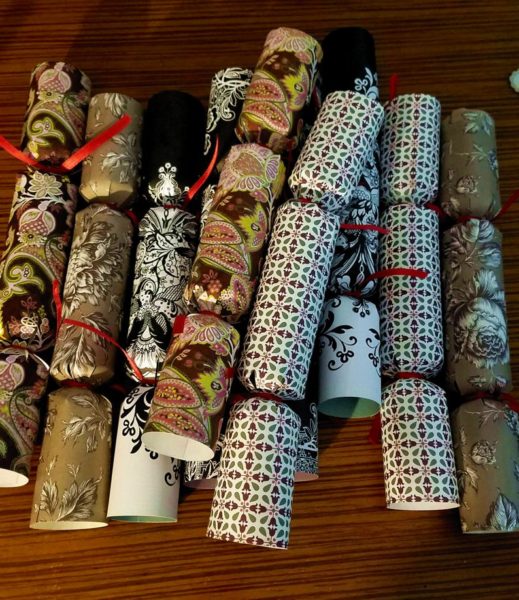
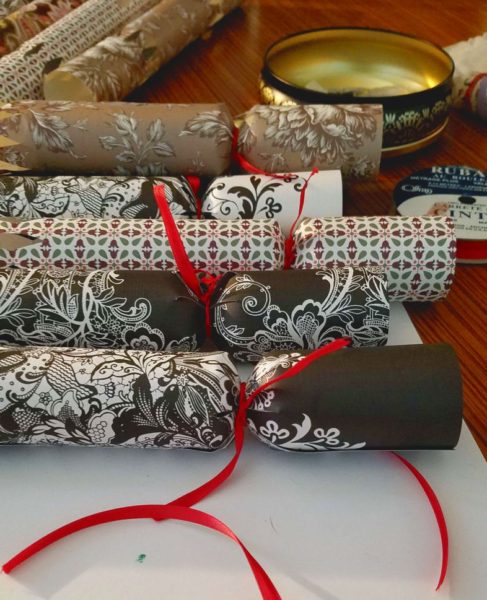
We have been spreading our love of Christmas crackers to family and friends for a few years now. They used to be harder to find in the southern U.S., but are now made for just about every holiday and found in almost every home decor shop and catalog.
This year I wanted to make foisting crackers on family a little more special. I decided to make my own. This version does not actually ‘crack’ with the snap strip that gave crackers their name. I have been trying to make crafts to use up supplies in my closet. Since I didn’t have snap strips in the closet, I did without. I figured this was fine, because in my experience, thy only worked 10% of the time, anyway.
What you will need
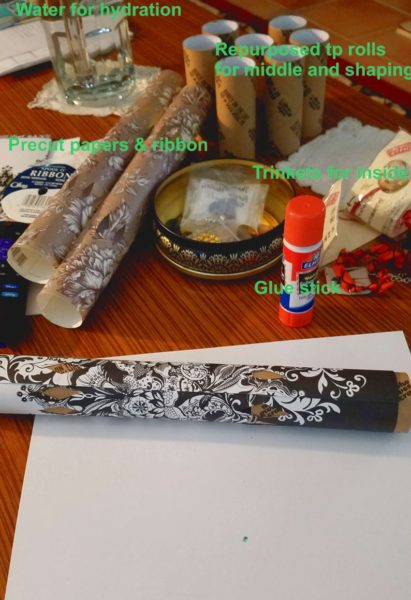
Craft paper of some kind
ribbon
trinkets and jokes to put inside
cardboard tubes (I used tp cores)
a glue stick
scissors
ruler
I did this project over a couple of sittings but you could totally do it all in one go if you were so inclined. First, I gathered up all my inside bits. I didn’t make up any tissue paper crowns as would normally be found in a cracker, but I did write up some terrible jokes and gathered a couple of trinkets for each. You will need to make sure the trinkets conform to the shape of the tube. I used little jewelry baggies to hold small parts together and rubber bands to secure floppy, oddly shaped items into more compact packages.
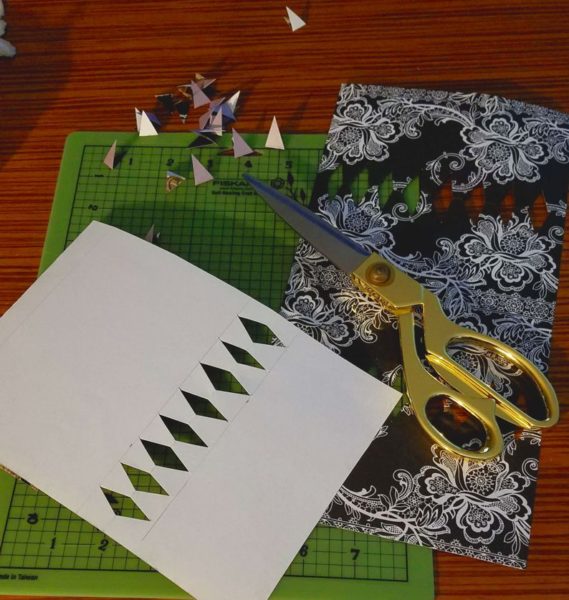
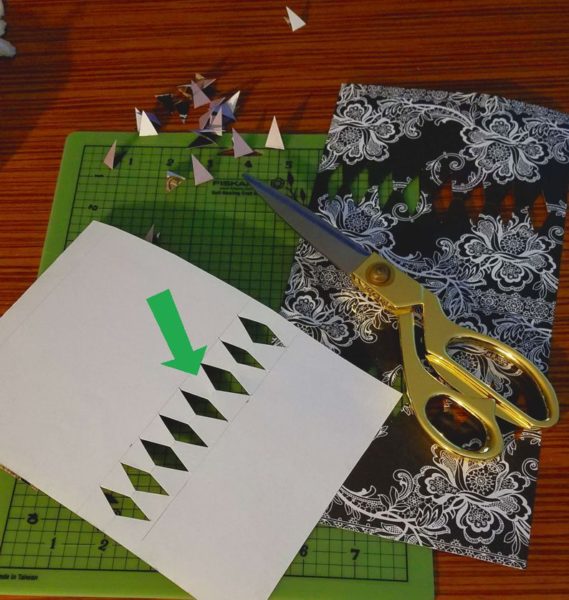
Second, I grabbed my cardboard tubes and used them to measure my craft paper. If you use stiffer paper you will want to cut diamonds into the paper to help you cinch the ends together. My tubes were 4 inches long and 1.5 inches in diameter. My diamonds would need to be 1.5 inches long and start on either side of the 4 inch strip in the middle where the tube would go.
If you are using more flimsy paper, like wrapping paper, I would not suggest cutting the diamonds. A couple of the sheets I used were more printer paper weight and they were a little delicate around the cuts. Wrapping paper can also be easily cinched without cuts, though, if you use it, you will need card stock to help the ends hold their shape.
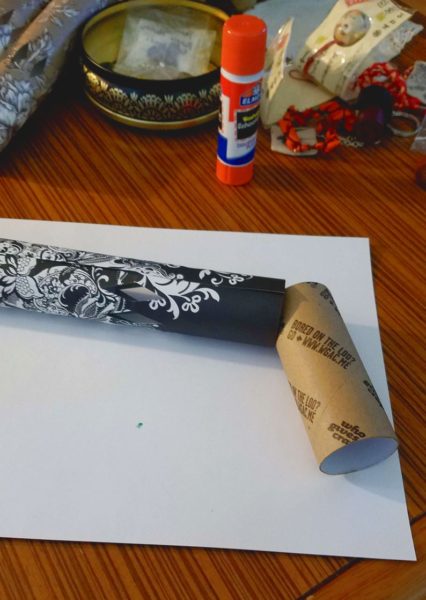
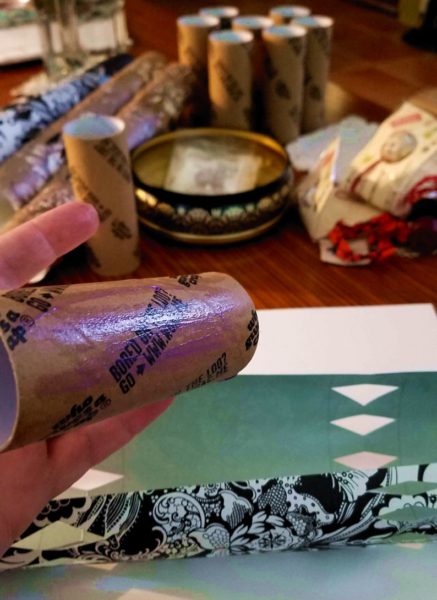
A few tips I have picked up while making these that made the process go so much smoother: 1) use extra tubes to help you keep your ends shaped. You will only be gluing a tube in the middle, but you will want to retain the cylindrical shape from end to end. Sliding an extra tube in each end is super helpful with this. 2) pre-roll your paper, especially if it is heavier weight, and 3) apply glue to the tube, not to the paper. Applying glue to the tube helped it adhere better and minimized the chance of wrinkles.
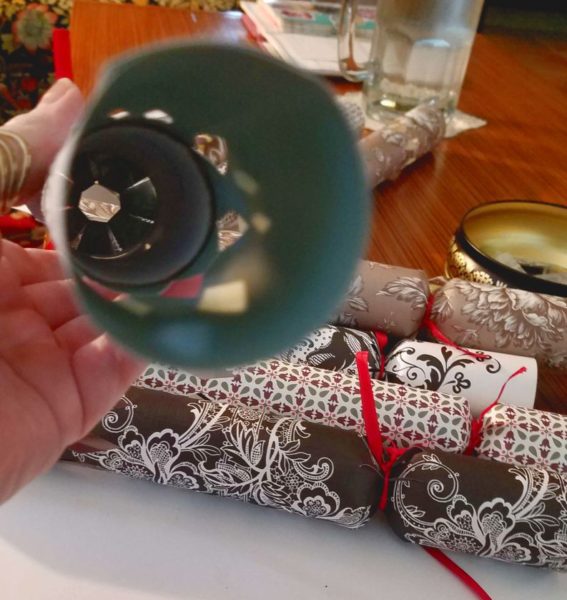
When the glue holds without you holding it, remove the extra tubes from either end. Tie your ribbon around one end of the cylinder over your diamond cut-outs (if you have them). You will not be able to completely close the ends (pictured above) so make sure your trinkets are not too small.
Of course the holes on either end of my cinched crackers would have been smaller if I had left less room between the middle points of each diamond. This space is what will determine how tightly closed the opening can get. You will have to figure out a good balance between a tight closure and enough remaining paper not to tear before it is meant to.
Once you have one end tied up, you can drop your jokes and trinkets inside and tie up the other end et voilà, you have made a cracker.
I will be giving all of mine away. It is a little hard to feel surprised and curious when I know what is in all of them.
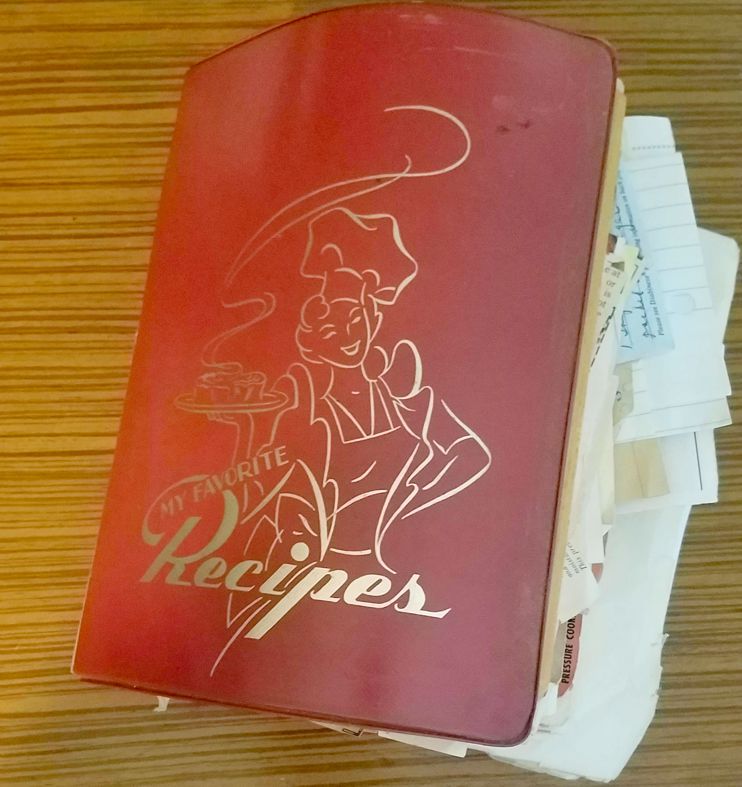
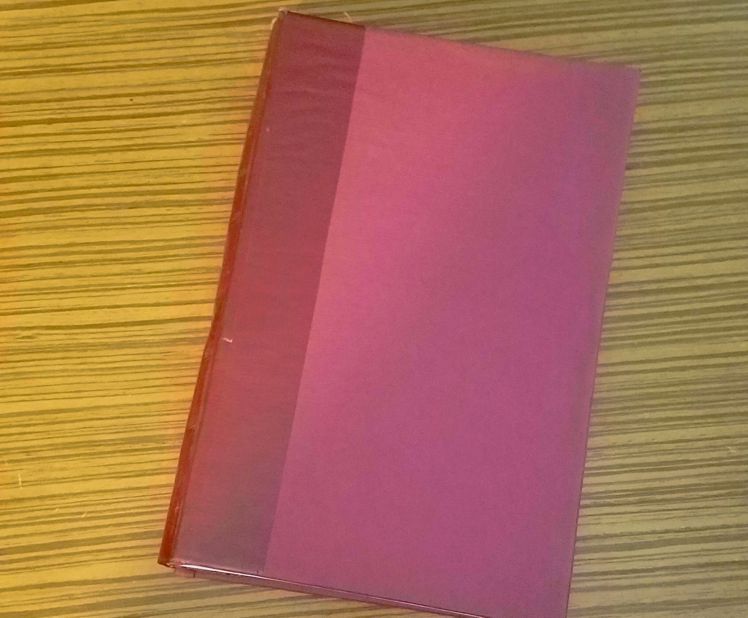
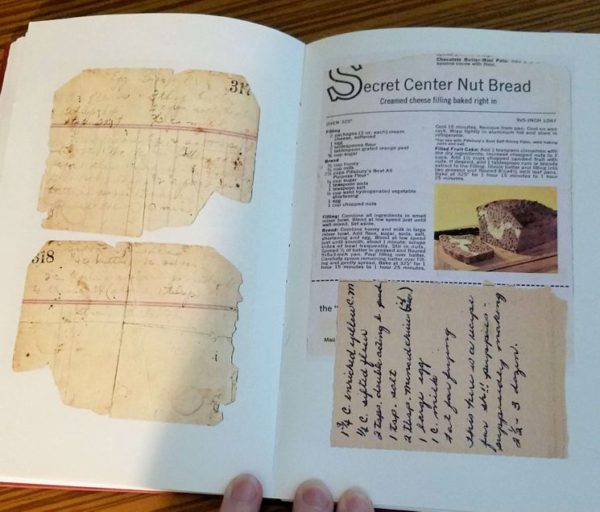
Taking an inherited recipe binder and making an easy to manage book
My Grandmother kept her recipes in a recipe binder fitted out with envelopes for the various categories. She had never used the blank pages for each section, instead relying on the envelopes to hold all her scraps of paper. She had recipes written on old envelopes, on drug advertisement notepads, clipped out of newspapers and magazines, and sent to her in letters by friends. I was lucky enough to get a hold of this binder and had the fabulous idea to scan them all and make a kind of recipe zine for easy navigability. I’m not sure why I thought that a bulging binder would fit easily into a zine sized book. Even squishing as many recipes as I could onto each half sheet page, I ended up with 333 pages.
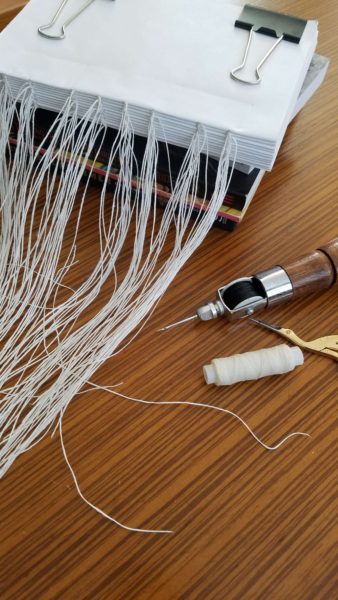
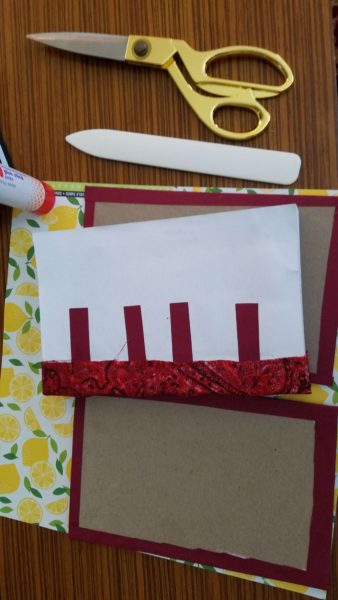
This isn’t the first time I played around with sewing sections of papers together to make a fat book, but it is the first where the pages were already printed up. I shoot from the hip when it comes to book making. I’ve read some articles, handled a lot of books, but I haven’t studied technique, so I made a lot of mistakes. But, the final product is exactly what I wanted: an easy to flip through, organized, collection of my Grandmother’s recipe clipping collection.
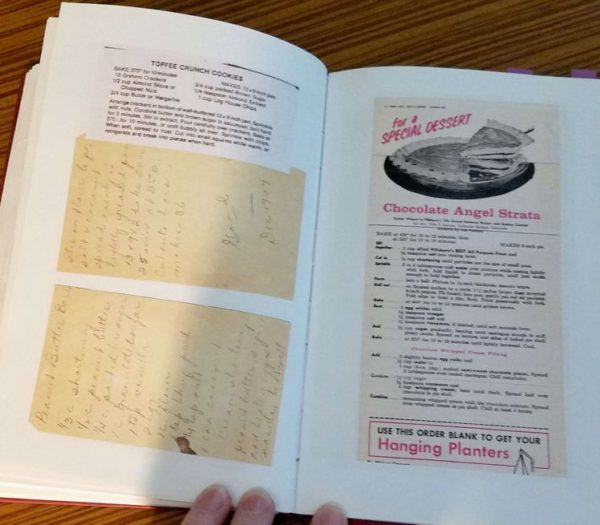
Scanning the recipes also gave the the opportunity to tweak the coloration on some of the oldest handwritten notes so they were just the tiniest bit easier to read. I already know the recipes I want to try out first based on the splatters, finger prints, and wear alone. And, though I included the recipes in this book, I will be avoiding all the molded jello salads. I just can’t.
First off, this is a learning journey where I ramble about a thing I tried. If anything, maybe it will help ya’ll get ideas or learn from my mistakes, but it is so not a tutorial to replicate.
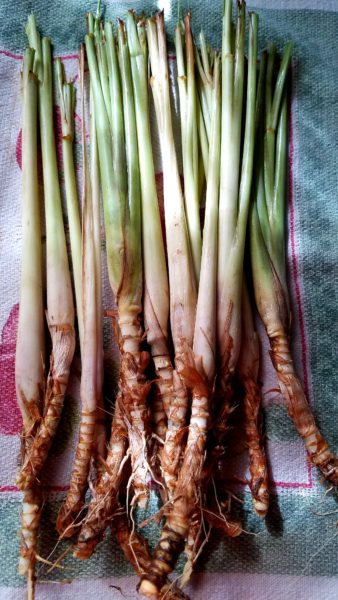
I received three weak looking stalks of grass from a co-worker one spring. I planted them and by the next spring had a sizeable spray of pleasant smelling and surprisingly fierce lemongrass. This stuff will cut you up, seriously. So, I pulled it up and divided the clump into three, harvesting a handful of it without really knowing what I was going to do.
After pondering for a while, I decided to make a tea that I could add to moisturizers, astringents, and facial refreshers that I was making.
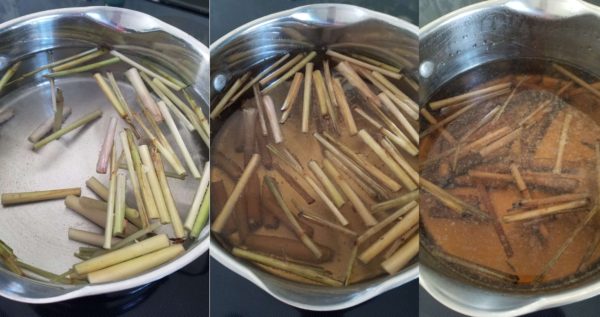
A.) not ready yet B.) this is fragrant and ready C.) this is too far and smells like old tea
Of course I looked online for ideas and no, I wasn’t going to make a hydrosol or attempt to extract the essential oil, because I didn’t have the equipment or the patience for all that. A tea would be good enough. It wouldn’t necessarily have the shelf life of other permutations but I would deal with that.
And all of this would’ve been fine if I didn’t start by over steeping the tea. I don’t think it really ruined it for what I wanted, but it got way past the point where it smelled lovely like lemongrass cosmetics. The first thing I did, of course was clean the stalks off. Then I bruised them and chopped them up and put them in a big ole pot of water to simmer slowly. I can’t even tell you how long but I did remember to take pictures of the process. Pic B would’ve been perfect. Pic C was overcooked, really, but was like tea that you’d get from a teabag when making the concentrate for iced tea, complete with the oils that sort of float on top before you dilute it with an equal amount of water.
So, in the end I did use it, but not all of it, to make a nice facial wash and it was sort of pleasant. Lemongrass is an anti-microbial, anti-bacterial, and fungicidal herb, so it is really good at warding off infections, acne, rashes, etc. Lemongrass tea can also be drunk, of course, but I made it a bit too strong and that lovely aroma just sort of ends up tasting like soap in large quantities.
The three bunches of lemongrass that I replanted after dividing are now as big as the original clump and it’s only been a season. I’m going to have to get better at using it for all sorts of things. And, I’m going to need to get some gauntlet gloves probably. The cuts from lemongrass aren’t quite as bad as when a pineapple gets ya, but they are much harder to avoid.
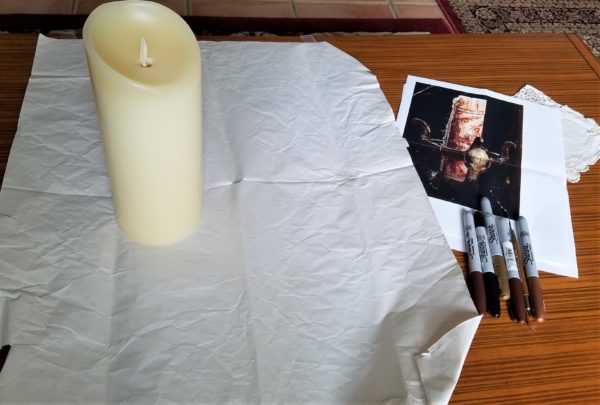
I am not alone in being absolutely delighted that a line of merchandise from Hocus Pocus (1993) is available at my local Halloween store. And, I’m sure I am not alone in being disappointed that the merch makers have neglected to make the movie replica I would most like to have: the Black Flame Candle. I was disappointed enough to make one for myself.
I gathered together as many screenshots as I could find from the movie that showed the artwork on the candle. After some unsuccessful searching on the internets for block prints that look like they inspired the original, I decided to wing it.
Step One
Protect your surface and gather all your materials: large flameless candle, permanent markers, carving tool, and reference photo.
I made a thing. It is my second stop motion-ish video and I learn something new each time. By no means is it perfect; this is totally learning by doing. But I’m still proud I made a thing.